Hello and welcome aboard our Stamp of the month Australasian Close to My Heart Blog Hop. If you have arrived here from Maz’s Inky Fingers then you are in the right place. If you landed here by accident, no problem, please join in by following the link at the end of this post.
How cute is this???
S1412 Cutie Pie
I Love it and I have had a LOT of fun making cards and pages with it already! I know many of us have been hanging out for this Stamp of the Month to get here and yippeee here it is! December Stamp of the Month is Cutie Pie S1412 and it is available for $27 or for just $5 when you spend $75 with your consultant. (Ask your consultant about the additional Deal of the Decade if your order is at this amount!)
I have decided to pair my SOTM project up with the new paper collection Heartstrings because it comes with a card making kit rather than a WOTG, and we have a yummy mini pack of coordinating PML Cards. So, it did not take me long to come up with this layout.
I have focussed on the blues in the PML cards. The best match card stock and ink was Crystal Blue. I used our biggest block (4 x 5 Y1012) and started by mounting all 4 cupackes on the block in random directions. I then stamped this rotating the block 90 degrees and 180 and even rotating the paper. This gave me the random stamped cupcake background.
The side strips are a 2 inch strip of Crystal Blue embossed with the new Diamond Embossing folder. It looks and feels really quilted! I added the flourish from the Heartstrings complements, inked the edges of my selected pml cards and added a zip strip to one of the photos mounts. Random scraps also make a great washi look and you need that bit of bling with silver shimmer trim.
I had already been playing in my paper packet so I had B and T scraps to use – but you could use PML cards if that is all you have. Stamp a cupcake (or 3!) using Black ink on the Heartstrings B and T papers. Mix it up. Separate the wrapper from the top of each one and shuffle them around. Adhere them to a small strip of scrap paper as you put them back together. This will support them. Then use foam mounting tape to adhere them to the page. I used a strip of B and T paper as a ‘shelf’ to put them on. Don’t forget the sparkle for the top!
I added some heart stamps and some puffy hearts from the new Stuck on you Puffies just to finish it off with a bit of red.
December SOTM is only available through till Dec 31 is from your CTMH consultant.I’d love you to leave a comment before heading off to the next stop, Wendy Hopper,to see what she has created for you.
PS Make sure you have a go at the page by CTMH on page 16. It is a LOT of fun to make.
PPS…Be sure to follow the hop…grab a cuppa and hop along to Wendy Hopper and keep going! There is some really inspirational artwork this month!
For this hop we will be featuring the letter W. This may be the name of a paper, a stamp set or an embellishment. Whatever the crafter has chosen as their # element will be featured in their post. If you have just hopped onto my blog, please start at the beginning at Linda’s blog ~ Scrappy Therapy If you came from there then you’re on the right track!
Welcome to Wildwood and Wanderful!
I will be honest I was almost as indecisive about which of the two products I am currently using to feature for W as I was about pushing the ‘buy now’ on my air tickets that would whisk me off on my fab seven week trip of a life time to Mexico and Disneyland USA for the CTMH Convention!
Would I share with you Wanderful PML Pages and cards, or would I share my Wildwood Z2001 My Crush Book Journal – a journal that is much more lovely when you open it than it looks in our Idea book?
Wildwood
The Wildwood My Crush Book has journal prompts, fabulous textures, loads of distressed pages and more. I loved it as soon as I saw the title page which I am sharing with you here, and I urge you to check out more than just the pages shown in the Idea Book. I decided to use the blank back of the cover for a few Wanderful PML cards to offer some of the back story to my trip. The card ‘just GO’ says it all! The title page ‘And so it starts….” is a sound beginning to this little story.
My first double page is about the decision to go and a little reflection about a regular day on the street in Mexico City. I used Wanderful cards for the journalling and of course in these kinds of journals we are supposed to break the rules….so while one page has a matted photo (Tres traditional) the other has this rather odd angled one. I also used the Black Arrow Washi tape and will probably use this throughout as the Arrows are a feature of the Wanderful Paper and PML cards.
Wanderful
My album is well underway, but I am still in week one! I love to journal and make sure every key thought, idea and reflection is captured too. I also have to remind myself ‘not every photo needs to be scrapped’. But journaling is different. I have it everywhere! My students and my team will agree I do not think we are done as scrapbookers unless we are journalling too. Let’s face it, I do not expect to be around forever to tell my grandchildren who everyone is in the photos, and what we were doing, thinking and celebrating.So…let’s make journalling FUN!! and SUPER EASY!
CTMH have the solution for us with the Picture My Life Product Range bringing Journalling cards in products like Wanderful PML. Almost every card in this set lends itself to story telling, making it a very different set to say Chantilly or Pear and Partridge which have a few more decorative elements and lend themselves more readily to card making too.
So, let’s move on to my scrapbook page. I really did not quite know how to scrap these photos. The photos are from different times of the day, all of the same place, the Zocalo (City Square). Red was the predominant colour. I just loved the Wanderful PML card that said ‘This is what the world looks like‘ as I landed in Mexico City right in the middle of a Cultural festival. The Zocalo was a tent city, each tent representing countries around the world, including Australia. So It really was an ‘around the world’ in a day experience and even included a UK red Double Decker Bus!.
The cards I chosen have a sentiment that reflects how I felt, just wanting to ‘roam’ as I did on this day. They gave me the way to not put every photo on the page (yes that is a flip flap stack right there with 5 photos) – just a representation of the day. This was easy peasy journalling and made a difficult to coordinate page an easy scrapbook layout! I still think it needs a bit more but I am armed with arrow washi tape and believe that will do the trick.
The stamped embellishments are from the Wanderful Workshop on the Go Stamp Set and Here we Go D1600. I used the same colours that are in the Wanderful PML Cards – Cranberry, Flaxen and Black. I am totally in love with the mini notebook stamp and it features already on many pages in this album.
BTW The pockets in the album are the strap hinge ones as I am stash scrapping as I complete these pages and they do a fab job to fill albums I already had on hand. I am loving CTMH Memory Protectors and their durable quality!
D1600Here We Go
Wanderful PML
Oh I Almost forgot!!! Up until now these collections came with a title page and plastic pockets. Talk to your consultant about the A La Carte version of PML – no title or pocket pages. That way using them like this does not leave you with 10 empty pocket pages! For Australian Consumers the A La Carte code is for Wanderful is Z3063
You can purchase the products used in the layout and My Crush book online at my store. Be sure to join my November Online Gathering to be in the draw for host rewards.
Wanderful PML Request – Z3062 (A La Carte PML NO Pocket pages – by request! Thank you CTMH!)
Hello and welcome aboard our Stamp of the Month Australasian Close to My Heart Blog Hop.
If you have arrived here from Mandy’s Blog, Hall of Indulgence, then you are in the right place. If you landed here by accident, no problem, please join in by following the link at the end of this post.
I have been having a hoot of a time with this month’s stamp of the month! This stamp is for ‘owloween’ but being a Dinky Di Aussie I do not relate much to this event in the calendar. However, I love what we can do if we explore a little outside the box with this stamp set and am very excited to use this in my teaching this month! I have created a journal page in my Bluebird My Crush Book. Z1856 with the results. I would like to share with you my project….soon…which features August Stamp of the Month What a Hoot! S1408 available exclusively throughout August for $24 or for just $5 when you spend $75.
Take a really good look at the shapes and designs and ignore halloween feel and you have the fun owl stamp, some really crazy eyes (and hats!) that you can put on a set of funky glasses, use as flowers on stems or in groups of circular shapes to make flowers or random stamp a background! There is a stamp clearly intended to be a batwing….well not for me. A smaller batwing stamp also gets a different treatment. I had so much fun coming up with this after thinking about looking through ‘rose coloured glasses’ with the eyes, or thinking ‘outside the square’ with the shapes and designs I hope you enjoy what I have come up with – a ROSE!
The owl,stamped in black on white cardstock, is coloured by first layering in the base colour and then while wet (work fairly quickly) add some darker shade then cross the two together with the same colour as the base. I have also used the markers to draw stems, the grassy bottom and color the little stamped flowers. The eye glass piece on the owl was stamped separately and is hinged on with a brad so you can move the glasses on or off.
Another example
The Rose is the larger batwing stamp stamped with the new Thistle colour. I stamped a number of these on a 6×6 white card. I fussy cut these and daubed the edges with thistle to darken them. I curled some using the Quilling tool Z1795.
I then began layering them onto a white base. I put three rows of the new Duck Easy Stick Z3033 (love it) on scrap card and layered petals wing edge up! I added more adhesive if needed being careful not to adhere the top side of each piece. This was so I could roll more if I needed to.The smaller batwing, carefully placed back to back forms wings for a butterfly. I just drew in the body,
I wanted a little more shade between the rose petals so I used a technique I have seen on videos with the messy mat. Simply make an impression on the mat with your inkpad to get a small amount of ink on the mat. Put a drop of water in it. Pick it up both water and ink colour with a paint brush and brush it into the inside of the petals. Wipe the mat when you are done. (You could also go back in with a water colour pencil and soften with a wet brush…but I wanted to use my new messy mat:)
Z
The leaf image was stamped in black. coloured with the green marker, then I used pear z2197 ink on a dauber to darken the edges after cutting them out. I cut some in half to make the ground for my pieced image.
The title, journal card and the eye glasses all come from cards in the awesome new For Always Picture My Life kit. Z2022 . I have used our lovely Marvey Uchida Lepen Z1979 to both journal and outline on my page. I use White Z2163 pigment ink to stamp ‘Wise’ using the new Hand Written Print E1030 alphabet stamp set and ‘owl’ comes from the stamp of the month. Yes, I did CUT the ‘owl’ word from ‘owloween’ for this purpose! I had heard of that being done but was never game to do it myself but I really wanted the font option for the chalkboard title. Remaining white on the title was achieved with the Chalk Marker pen. z1767
This journal page reflects how I have to look at things sometimes to stay sane. I hope you have some sense of the fun I had creating it. Try making flowers with the stamps on this set. You will enjoy the process if not the outcome!
August Stamp of the Month What a Hoot! S1408 is available exclusively throughout August for $24 or for just $5 when you spend $75 from your consultant. I’d love you to leave a comment before heading off to the next stop, Monika, A Sprinkle of Glitter to see her sparkle on What a Hoot. I would love for you to leave a comment before you head off!
I am heading off soon on a long awaiting walk down memory lane! Those who know me personally know my story and reason for going. My guess is many of you don’t.
In 1979 this little 15 Year old country girl from Australia took an incredible adventure as an exchange student sponsored by Wentworth Rotary Club to Mexico! It was very difficult in my small town of Wentworth to find information about this country! We didn’t have internet or google. My small home town library had 2 books I could borrow! Our Population in Australia at the time was around 16 Million in total. There was that many in Mexico city alone! I was bound for a culture shock.
I knew I had to learn Spanish and would be discovering that taste of chili and that was about it. I was supported in this journey by three host families and the family I grew closest to through a close bond and friendship with a rather cute Mexican guy. The experience left me very humbled as I discovered what a privilege it is to be born and raised in a first wold country and not have the issues of third world poverty, unstable politics and no healthcare system for the disabled and ill.
Really, while we might moan and groan at our current government (yes I am one of those) being in a country like Mexico reminds us to be grateful we have a system called medicare, we have social welfare and we do not have vigilantes running across the north of the country (with the governments blessing) trying to put a stop to illegal drug and sex slave trading. Puts it in perspective right? I was horrified in 79 to see police moving about our very peaceful town of Cordoba with machine guns for weapons! Really?? Yes – and I doubt that will have changed given the presence of issues like drugs and ongoing poverty.
What I loved was that in spite of the poverty, political unrest, poor health, Mexicans, privileged, middle class and poor were friendly, devout and made the most of what they had. They taught this 15 year old a lot of lessons about life. I also fell in love with the music, the dance, the language. I fell in love with Mexico, and upset my parents greatly when the first thing I said when stepping back on Australian soil ‘ when can I go back?’
It was a dream I came to believe would never come to reality. As I scrapped it 30 Years on I wondered if I really would get back.
10 years ago I made more defintie plans to return. It became a goal – one day. Fast forward a little and through Facebook I have reconnected with the one family that I connected with the most! I became even more sure a return to Mexico was needed. I am now 51 and my ‘one day’ Day is just 2 days away! It has taken 36 years, and my one day opportunity came this year.
The Lima Rizardo Family
Close To My Heart celebrate 30 years in the business this year and this is the first year that they have expanded into Australia and New Zealand. This is the first big event with northern and southern hemisphere consultants! The invitation to join the US and Canadian consultants at convention celebrating 30 years was irresistible! I had to go and then the idea struck me. This is it – the opportunity is now and I have to run with it! Mexico is a short hop over the border from LA!
I took ages to give myself permission to go. I mulled over the costs, the treat to myself, and fought the little voices in my head who argued with me about it but eventually I decided I could and should go. If you know the black dog of depression, you will know how hard even that step can be.
I am heading to Mexico for a month, spending a week in the town I am familiar with – Cordoba. Then I will revisit some of the places I have seen as a child, and go to places I didn’t get to. I am sure this trip will be very different, not because it is shorter but because now I will rediscover Mexico as an adult. I cannot wait for the sounds of Mariaches, spending time with families and people I knew, the beaches of Vera Cruz and Can Cun, and all the other flavours of Mexico. Then I have the excitement of the CTMH Convention in LA and Disneyland – a first for me. My dream trip is about to happen – watch this space. I will blog about it if I can. Here are some digital pages I did when I paper scrapped my first trip. Can’t wait to try and get the 30 years on photos side by side!
For this hop we will be featuring the letter E. This may be the name of a paper, a stamp set or an embellishment. Whatever the crafter has chosen as their # element will be featured in their post. If you have just hopped onto my blog, please start at the beginning at Linda’s blog ~ Scrappy Therapy (link: found on signup doc)
Today I bring you a project which begins with Envelopes and their cards from the CTMH Bulk Colonial White card and envelope pack.
Jubilee envelope mini album
I have used 4 envelopes and cards to make this fun mini album. The idea springs from envelope mini albums posted by Kathy Orta on You Tube, but I have made this slightly differently. I trust you will find these directions adeqaute, but if not by all means head over and watch her video, especially if you have never made a mini album before. This mini album should fit 20 trimmed 6×4 photos – or the equivalent if trimming or using smaller photos. There are a number of pockets you can add more photo and journalling cards to too. I would expect, if you have a go at this, that yours will turn out differently from mine, making each and every mini album and individual work of art because of our choices in paper and embellishment. The best results for a beginner will come from using a coordinated collection. If you wish to skip right to a video walk through click here.
All of my decoration has been done using the one paper pack, making it easy to ensure everything coordinates nicely. I chose Jubilee simply because it celebrates summer time and because some lucky person will get this as a gift! It would look just as nice with any of the paper packs. Envisage it with Ivy Lane, Ariana, Balloon ride – or use White daisy and try Lollydoodle. Have fun with the decoration using scraps, stamps, complements and assortments. Dig through your stash for pretty laces and florals if using Ivy Lane or Ariana for example. Whatever takes your fancy!
We are going to make this mini book in 2 sections. Each is the same – the second is simply a repeat of the first. If you want a bigger book – add another 2 envelopes and off you go.
Here are the steps.
Measure your envelope and your card. Write these down for reference. In this case we have envelopes 4 3/8 inches wide x 5 3/4 tall (sit them vertical at all times) Cards are 5 1/2 x 4 1/4 on each face.
Lay two envelopes vertically with flaps up together. Bond the two flaps of envelopes together.
Step 1 join 2 envelopes
Trim the closed edge on each side a smidge with a craft knife on the metal edge side of your ruler. This will form a pocket your cards will slide into. This is your foundation for everything else.
The CTMH ruler is perfect for this task.
Now we need to make a center pocket. Our card is 4 1/4 wide. We need to add a half inch to each side so cut a piece of Colonial white card stock at 5 1/4 inches wide. Trim to 10 inches long. Score 1/2 inch in down the length of both sides. From one end score at 5 3/4 (the height of the envelopes) across the middle. The shorter portion will get folded up , with the short side to the front and form a pocket. You need to make a little dart in the sides where this fold will go – this will help folded flaps sit neatly and reduce bulk.
Fold the scored flaps in the side at the small section toward the cente. Flip it over and fold in the long flaps. Use your bone folder for a crisp edge. Turn it back over and secure the front fold(smaller) up onto the long side and secure the fleps. I used double sided tape for this right on the edges.
To complete the pocket we need a back. Cut a piece of colonial white card stock 4 3/8 wide x 5 3/4 high. Attach this to the back forming another pocket. Do not be afraid to cut a smidge more off it if needed. Now you should have 2 pockets. (one with no bottom – yet)
Attach this pocket section to the envelope flaps. Use secure adhesive such as double sided tape or wet glue such as bonding memories glue. (BMG)
Now we begin to make the pocket that gets adhered to the envelope flaps
Once you have made this pocket attach it to one side of the envelope flaps.
You can now begin decorating all of the page faces.
Now we need some of your print pieces cut at a smidge less than 4 3/8 inches wide x 5 3/4 tall. Just nudge 1/16 to 1/8 of an inch less on your trimmer so they will sit just inside all of the colonial white bases.
Cover the left inside envelope taking care not to put any glue where we do not want it in the gap left by the flap. Run tape on the envelope edges top, left, bottom and centre. Use a fine line of bonding memories glue on the inside edge near the middle. Adhere your print paper. Repeat the same for the right side and do all four sides and across the middle of back of the pocket piece.
To decorate the pockets we need bits of paper to fit inside – especially the first so tags we put in don’t get caught on the paper when you pull them out. Make sure you cut piece to fit a bit down into the pocket and cover the flaps. So a smidge less than before – Approx 4 1/8 wide and about 3 inches long for the cover of the top pocket. Measure your bottom piece. I used a scrap that didn’t quite reach the bottom but this isn’t a problem because it gets covered.
I apologise there is no photo of the next step but you will see it in the video.
The piece to finish the bottom was cut with the cricut. There are many borders you can use. I used the Cricut Craftroom board. Copied the border. Flippeit, Welded it, stretched it so the whole piece was 3 inches wide. I cit it at 11 inches because I needed two. One for this half and one set aside for the next.You can see this in the video.
Score this in the center. Score again left and right of the center by about 1/8th inch. (CTMH ruler grid has 8ths making this easy. Fold at the 1/8 score lines – the little gusset will allow for the widths of the papers here and fit snuggly, Adhere this at the side and bottom on the front to the pocket. Flip it over and adhere to the back. You now have a third pocket to tuck in tags and tickets!
Now you need a gusset. This is a 3 inch x 5 3/4 strip. Score at 7/8 and 1 1/8. This is the gusset – allowing room for bulking up your album with tags and photos without straining the spine. CTrim the top and bottom with a slight angle to reduce bulk in the top and bottom. Adhere one side of the gusset to the back of your mini book section being careful to be nice and straight.
That is it – decorate inside, make tags and then go ahead and make a second one (or a third if you are game – the principles are the same)
Congratulations you have finished the first section of your book. Do the sam again with the second one.
Join the two books together by adhereing the gusset flap of the second to the back of the first half. You front gusset should still be loose.
The cards can now be inserted and decorated as you please. Sometimes I had a theme run over three spaces, other times each panel is diffrent. I also decorated inside cards as well as the flap that shows as a page.
Carry on decorating – filling the pockets and making tags. Stamp designs on, add some bling, some string and more.
Once you are ready to put the two (or more) pieces together strong bindings and covers need to be considered. I located great tape, a stiff piece of cardboard (Chipboard in USA language – in Aussie speak this is a timber that requires cutting with a saw!) and a bit of ribbon from my stash.
Binding
Now we need to add a closure. In the original video series the closure is done with chain. I prefer ribbon so that is what I have used. A good bit of BMG or even modge podge will enable you to wrap a length of ribbon right around from font to back. be sure to leave enough length to tie off.
Use your stash for the closure
The cover is now needed. If you have good strong cardboard you can stick dome of this down and decorate with paper. This is a small book and not to weighty. I decided our cardstock would not be enough. I found stiff cardboard. Once this was on I added a strong tape hinge here. I inked Cranberry cardstock with Colonial white for the back cover and got a bit clever with the front (see below) You can of course go bigger just like a book cover is bigger than its pages if you have the nice stiff cardboard (or chipboard as it is called in the USA) . I also put red on the front as my carefully selected piece is about to be fussy cut with the dovetail flags and ticket being mounted with foam tape. I needed red underneath. At first I tried it as one piece but the book didn’t open well. Two pieces were better.
I have covered the tape on the spine with a piece of hemp – CTMH burlap ribbon would look just as good
After adhering the cover cardstock and images it is time to decorate the outside – ribbons, bows, washi tape, lace, buttons and charms are all options you can use.
Here is a video flip through of my mini book made with Envelopes. It isnt brilliant but will supplement the above instructions.
I hope the video has filled the gaps and if not, I strongly suggest watching some videos on making envelope mini albums. They look fabulous and make a great gift and I really like the size of our CTMH envelopes!
Leave me a link in a comment so I can come and give you some kudos!
Supply List
You will need
4 cards and envelopes and 2 sheets of colonial white card stock.
Your selected paper pack (in this case Jubilee) and embellishments
Bonding memories glue (BMG)
double sided tape if you have it – it really sticks
Trimmer, ruler, bone folder, microtip scissors, a craft knife and versamat.
Close To My Heart Supply List – All Items are available to order online at my store. Once you are done shopping it will be shipped right to your door.
I have been cleaning up and making way for exciting new products coming out in February. I had a LOT of For Always scraps as I used this paper as a feature in an albu,. I had zip strips, 1 inch strips, little rectangles and squares. There were lots of bits of paper I was loathe to throw away.
I got myself some silver card bases which made a nice background to this paper and went to town with my scraps. I made a dozen cards and 2 scrapbook pages!
Here are the cards I made using the current Stamp of the month
Using the Stamp of the Month
Using Stamp of the Month
For these cards I used the stamp set in the Sarita WOTG kit
Here is the page using stamps from the For Always WOTG
For these I made use of all the strips in the first one and in the second I punched little 1/2 inch squares and the Zip Strip for the title
Finally one that started out as three blocks and grew to something special inspired by Atlantic Hearts Sketch 37
Sketch 37
For this one I have used the Card Word Puzzle set and coloured the images with a variety of Exclusive inks markers. I little shine is there thanks to Liquid Glass.
This was the first of three sets I will be doing. It was fun and now I have an even more fun stash of cards ready for the right occasion at very little cost since I used scraps to create them.
If you like the papers featured here be sure to pop over to my online store and make a purchase of For Always before it disappears completely. The same will be the case for the Sarita WOTG stamp. Also retiring is Card Chatter. As a bonus while you are shopping you can get the Cloud Nine Card making kit and Stamp of the month with qualifying orders!
Do you like to brag? I am a bragging Nana and now I have this awesome little handbag size album to go bragging with!
This is the awesome little hip pics album. The project features my Grandson on his first birthday at his cake smash photo shoot.
For those of you looking for the perfect Christmas gift here is an idea that will suit your budget, your time, and a number of different people on your list. The Hip Pics Album kit is now available to CTMH Australia for just $18 and can be done quickly and easily in under two hours. I did this one for myself, but can see it would easily make a fabulous gift for a loved one in a number of ways. A Hip Pics Album is a fast, easy, cost effective project for you to make for someone special- and we all know how much people love gifts with photos and memories in them – or you can purchase a kit for your best friend or mum who are crafters themselves. If you want just that Hip Pic album and use your stash to decorate it that is possible too as they can be ordered on their own for $12 each.
Assuming the photos are already picked out and printed in under an hour you could have this done – a little more if you like to decorate more.
Check out these pages
There are 8 white pocket pages in the book therefore room for 16 photos. All you need to do is trim photos to suit the 4×4 window and mount them on a piece of cardstock 4 1/4 x 6 and slide it into the sleeve. Put one photo each side of the card. Then decorate and journal. in the ample space below and around the borders.
The kit comes with 5 sheets of petite die cuts in kraft, navy blue, pink, aqua and yellow and are just the right mini size for these 4×4 photo windows. The kit also comes with a coordinating stamp set so you can decorate those die cut embellishments with your ink. Add more decoration with sentiments and icons from other stampsets in your stash (if you are like me and need to decorate a little more!) By the end of the project you will still have loads of those die cuts ready to pop into another Hip Pics album. If you would like to make one but do not have ‘all the gear’ let me know and we’ll get you booked into a class to get one done.
Isn’t this just darling?
awesome pages done fast makes good sense for a great gift!
Items used to create this project are all available online now at my Jen’s Creative Classroom Close To My Heart online shop. If you join in on this months Monthly Virtual Gathering you may end up being the winning host and earn some great rewards. Click the link here an select join the November Virtual Gathering to do your shopping. You can simply enter the codes listed below or jump straight to the Holidays from the Heart guide to fin the Hip Pics Album and more. Don’t forget, you can get Stamp of the Month Illuminate for just $5 with a $75 purchase, and a free starred item from Holidays from the Heart with every $130 purchase!
Hello and welcome to the promised part 2 of my Magical Days of Christmas Flip calendar. if you missed part 1, it is here.
Our journey continues with stamps, cricut cuts and bit of glitter and shine!
13 stars and bling
15 Summer fun! The frame is from Artbooking
16 Inpired by the postage stamp style I cut this mat with the Cricut Artbooking cartridge
I lacy frame was needed to go with 16. The cricut is becoming my friend!
Trees and more tress. By now my inspiration is truly coming from the stamp design!
BTW have you finished your shopping? By the 19th you are running out of time!
Oh little tree…oh little sparkle stamp!
I love this little tree stamp – and at just $4 it is a very useful addition to my Christmas stamp collection!
21 swirls and curls
I love the various artbooking pages in the Artbooking Cartridge and this swirly curly one is no different. I added a splash of glitter here having discovered the ease of a generous dose of Mod Podge and a sprinkle of glitter. If you do this do it on baking paper for easy return of excess to the bottle and binning the rest.
Awesome overlay on the Artbooking cartridge, a bit of Mod Podge and glitter, a reindeer and voila Christmas is all bling and shine
Overlays….oh my! I love the Artbooking overlays and this was cut quickly and easily with Artbooking. As a bonus I have the negative shapes ready to put on other projects! The reindeer is also in Artbooking – a touch of glitter and a sparkle red nose added a finishing touch.
Baubles and the circle shape from the Halloween section of the Artbooking cartridge comes to life for Christmas. All I had to do was think outside Halloween – lollies go with Christmas and the round shape of the page suited the bauble.
Ho Ho Ho it is so hot where I am I would be hoping for snow!
It is by now Christmas eve and in the land downunder we are likely to be cooling off in a pool in my region! It may be over 40 Celsius here! The kids are excited with the traditional image of Santa and his Reindeer, and we can only dream of cool snow. Ho Ho Ho we have our Christmas cheer on at least! The Ho Ho Ho stamp is another of those cute little $4 ones that is essential to my little collection.
December 25 cut right from the Artbooking Cartridge!
This page is cut at recommended settings in Artbooking. The Yo Yo is 2 2×12 inch strips accordion folded at 1/4 inch. Onto these I have popped a sparkly snowflake and finally the 25 stamp. I used white behind ‘December’ to help it pop out!
I have enjoyed doing this project and look forward to taking a page off the stand as each day goes by and journaling or adding a photo each day.
All products used in this project are available from my online store to any resident in Australia. Why not head over there now and start shopping?
Your Wish list to make this project:
WOTG Sparkle and Shine pack G1071
Sparkle and Shine Paper Pack X7176B
Magical Days Stamp Set D1552
Santa Clause Stamp Set C1567
Santa’s Greeting M1028
Tee Delights M1032
SOTM Scandinavian wishes S1310
Silver Z1799 and Red Z1848 Shimmer trim
White Chalk Marker Z1767
Inks – Slate Z2173 Cranberry Z2116 Juniper Z2165 Colonial white Z2168 or white daisy Z2163
Flip Stand Z1896
Artbooking Cricut Collection Z1906
Art Philosophy Cricut Collection Z1686
3D foam Tape Z1151
If you do not have a Cricut machine yet ask me how you can get one at wholesale price just in time for Christmas!
* The Holidays from the Heart guide has starred items. You are entitled to one FREE starred item with every $130 purchase. Order online and have your goodies sent straight to your door. All orders over $75 are also able to get Stamp Of The Month (SOTM) for just $5. Awesome savings for you!
** The Holidays from the Heart catalogue now includes more products including washi tape and gift bags – take a look!
If you have questions at all please post a comment and I will try and answer them for you. If you live in or around Sunraysia and want to see this and many more projects, or join in on a Play Day let me know. Thanks for stopping by!
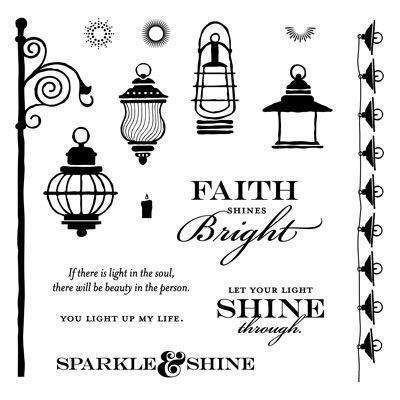
I love the Stamp of the Month Program with Close To My Heart and this month’s stamp brings with it lots of Vintage Chic appeal as well as positive messages of hope and love. ‘Faith Shine’s Bright’, ‘Let your light shine through’, ‘If there is light in the soul there will be beauty in the person’, Images of light abound in our life and our stories, and we can easily relate to the symbolism that goes with the word ‘light’. I have only just started on uses for this stamp set.
Illuminate! What a perfect name!
Illuminate Stamp of the month (SOTM) You can purchase this stampset for just $5 with every $75 purchase. Head to jenscreativeclassroom.ctmh.com.au now and place your order!
While this stamp set can be seen as for Christmassy pags and cards, as a complement of the Sparkle and Shine paper and stamp collection, I like to think it can be so much more! As a result I am pleased to give you some examples to get you thinking about what has brought, or is bringing light into your life!
I have often used light in reflections I have prepared. Light is a timeless symbol of faith, wisdom and joy. In this stamp set we have the Chic lamp base and a range of lanterns which is very trendy and quite ‘Parisienne‘; a string of lights that can highlight being centre stage, sentiments for a range of hope and gratitude moments and even the cutest little candle. Can you see it here?
Let Your Light Shine Artbook page
I celebrate the ‘light’ and excitement my first two team members give me on a regular basis. I am also very much into artbooking and invite you to follow along with the artbooking videos CTMH are producing in their series Artbooking Made Easy. For this page I have used the cricut and Artbooking Cartridge to cut photo mat 1on p44 at the recomended 8″ which is perfect for the My Creations Kraft 3 ring binder. From the same page I cut ‘inspire’ (title – shift) I also cut the small overlay from page 50 (Overlay – shift) at 8 inches (it doesn’t turn out that big!) to create the lattice fence look. Everything else on this page is stamped using the stamps in the Illuminate set as well as the swirls around set,
First I random stamped some colonial white cardstock big enough to back the lattice piece with the little round radiant light stamp using Topiary. I then fixed the lattice to this and trimmed to fit. The word inspire was cut with the cricut when I did the page so I have coloured this up by smudging it with Hollyhock Pigment ink. Then I stamped the background on the page itself with the lamp base, a lamp, the lights across the top, the title, and on the tab I put the sentiment. I trimmed my photo to fit within the lattice overlay shape. The lattice is adhered as a pocket using foam tape at sides and about 1/3 of the way up from the bottom so the photo slides in and out. I did this as behind the photo is my journalling! I like to create surprises in my artbooking!
Artbooking page using Illuminate stamp of the month set.
Key Products Used – Cardstock Champagne, Colonial white, New England Ivy; Inks Slate, Topiary; Stamps S1311 Illuminate and D1551 Swirls around; Cricut Artbooking cartridge from the Artbooking Collection Z1906
In the second project I just happened to have some awesome photos of lights and the sentiments on the stamp set matched these photos perfectly. Not only is this page about the lights but about the awesome mood of the evening I spent with fellow Close To My Heart consultants at dinner in the Spaghetti Tree in Melbourne while at Creative Kickoff .
I also like to step out of the box with papers and these are 100% from the Babycakes Workshop on the go kit! Yep, the page has nothing to do with babies, but the stripe, the orange and the yellow were all colours I needed to enhance the lampshades and the embellishments added an additional bit of fun light to the page! The bronze shimmer trim did not go astray either! As to techniques, here I really really sanded the Sunset paper edge – using a foam sanding scrubber! I inked the edge of the orange stripe and the yellow print, and rolled up the edge on the striped piece before adhering it all down. The actual layout is based on one of the designs in that awesome book we all get in our kits ‘Reflections’ scrapbook program, p40.
Faith Shines Bright was the perfect caption for this exciting evening of fellowship.
Key Products Used – Cardstock and B and T duos paper from Babycakes WOTG G1068 Inks – Slate; Bling buttons – the assortment in Babycakes WOTG available separately Z1869 Stamps S1311 Illuminate and D1551 Swirls around; Bakers twine is from the Harvest Assortment Z1751; Reflections scrapbook program 9037
It is so easy to get hold of these SOTM (stamp of the month stamp sets) for just $5 instead of the full price of $24. All you need to do is place an order to the value of $75 or more and it is yours for $75. Don’t forget our Holidays from the Heart promotion continues with the addition of a FREE starred item with every order valued over $130. If you do not have Artbooking for your Cricut, grab that, get your $5 stamp of the month AND a free Holidays from the Heart item! That means awesome savings for you! If you do not have a Cricut contact me for details on how you can get one at a very exclusive price with all Australian Warranty.
You can see these projects at upcoming workshops and events. If you would like to know more drop me a line and I will send you my latest newsletter. or subscribe online at my Facebook Page
I would love to have your feedback! Please feel free to leave a comment and I will do my best to respond. I hope your creative brain has been ‘enlightened’ and you are inspired by this awesome stamp set. I can’t wait to see what others have done with it. Follow my pins for more ideas so graciously shared by other Close To My Heart Consultants and Customers.
Stay Tuned – part 2 of the Artbook Advent Calendar is coming!
Close To My Heart have three beautiful trees on the cover of the Holidays from the Heart shopping guide. You may have seen them. And admired them. If you haven’t seen them yet here is another peek.
Aren’t they just gorgeous? Naturally all of us in the CTMH family have been waiting for the opportunity to get hold of the paper, put our Cricut machines to good use and make them. So many of us in Australia are now Cricut owners and love it! (Message me if you would like to know the best way to get yours. )Some of us have completed the project and while not as stunning (because they seem to be so even and well spaced!) as those in the photo we have done a pretty good job recreating these trees.
Cut and score
Fold and join
It begins with cutting 22 pieces of paper! You need at least 2 strips to score and fold then stick end to end forming a circle once folded.
By squashing these flat and adhering a circle top and bottom with your trusty hot glue gun you end up with a yo-yo or rosette – a popular embellishment in the paper craft world. By making these in gradually increasing widths (cricut dial sizes set from 1 inch to 2 1/2 inches you can then stack from large to small making a nice tower. It actually even feels a bit like pine cone when done! If you want a more frilly look for the larger sizes you would cut 3 strips to push into your yo-yo.
I have a couple of tips for you if you dare to give it a go.
Lots of yoyos all glued to a circle top and bottom
You will need 4 sheets of double sided Sparkle and Shine papers to get enough pieces to create at least 11 rosettes.
Scoring can be done with a ruler, stylus or bone folder and a mat if you do not have a fancy scoring board.
You can adhere all these with liquid gloss but you need time for this to firm up.
You are best to use a HOT GLUE Gun. For speed and ease, it really is the best option. Use a scrap piece of cardboard under your work to spare your table any damage from hot glue. If you have acrylic nails you may like to protect them from damage too.
Be careful – hot glue burns, as does the tip of the gun. Have your spare glues sticks nice and handy ready to refill – you will need quite a few for this project.
When gluing pieces end to end be careful not to burn yourself with hot glue when you press pieces together – the glue will come through the holes in the pattern,
When making the very top rosette, before gluing the second securing circle, pierce a hole through it and insert a toothpick that will then be fixed in place with the final gluing. You need this to act as a stand to whatever you top your tree with. It can be broken off shorter if need be.
When layering each rosette one on top of the other you may find at times it will need a little leveling depending on how even your original rosette has been glued – use hot glue like mortar – adding more to the die that needs leveling up. Keep checking the way it is standing – you do not want to end up with the leaning Tower of Pisa! Have it nicely balanced on a vertical center all the way up. If you are really worried about this pierce all binding circles and slide the whole lot over a bamboo skewer as you build it up n layers. You are using this to keep it straight – The tree is quite sold when done so the skewer is not needed for stability. I did mine without a skewer and I am quite happy with the result. Hand made is not meant to be perfect anyway right?
Allow 2 hours for all of the above then you can do the decorating,
I used tag shapes for the tree topper – but you could also use a star or a snowflake. Tie a pretty bow, add some round shaped beads or buttons – I found 3 unique buttons in my stash.
Following the example from the flyer, I decorated my tree with snowflakes. I decided to try Mod Podge and I needed to bling it up so a shaker of fine glitter did the trick. A generous helping of Mod Podge painted on the snowflakes, sprinkled with glitter and allowed to dry.
Sparkly snowflakes
Juniper ones added a nice touch
I have used baking paper underneath this part of the work for several reasons. First the snowflakes were easy to move around and second, once finished I could pour excess glitter back into the jar as it slides nicely off the baking paper. Finally clean up is easy – scrunch up the paper and bin it. Be sure to wash the brush you used to spread Mod Podge around with really well. Sard soap is good for cleaning brushes. Mod Podge is readily available in craft stores. I used the Matt finish one.
Once again the best way to glue these on was with hot glue. If you end up with ‘hot glue strings’ don’t worry – many of us do – it is normal! These can be pulled away or melted away with a heat gun.
And there you have it – the lovely tree ready for the Christmas Table! Mine is just sitting on a nice teelight candle holder.
My Completed table tree. If you are local and would like to make one pre-order your Sparkle and Shine paper ready for next workshop.
Why not plan to get one of these done for your table? Plan ahead by pre-ordering your paper, having it pre-cut and coming to a workshop to get it done! Contact me for more details or check my workshop schedule over at my Facebook Page. (Workshops are in the Sunraysia Region)