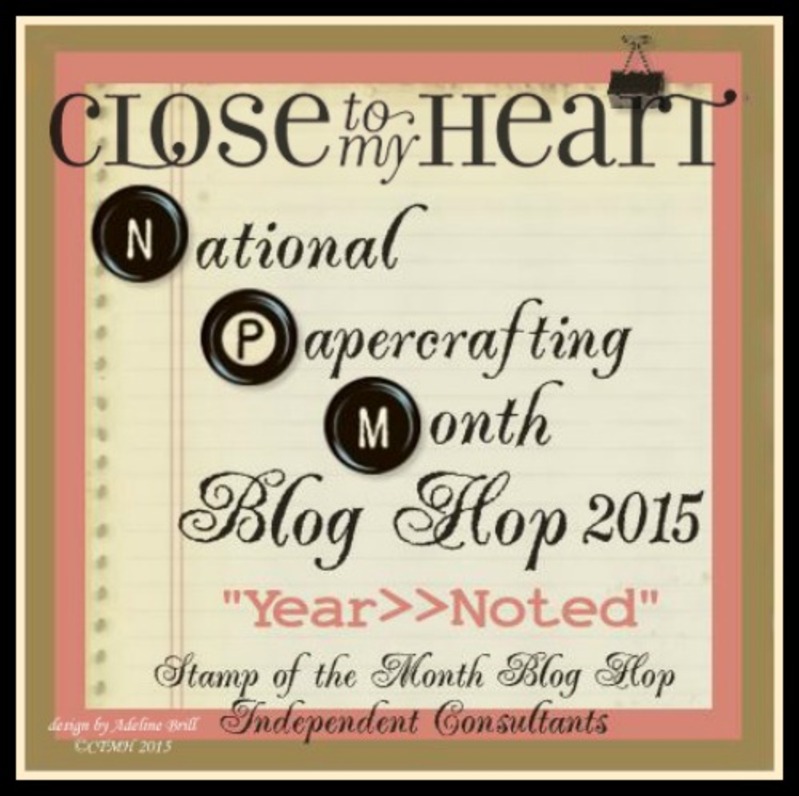
Hello and welcome National Paper Crafting Blog Hop Year >> Noted! This exclusive collection available to qualifying purchase of $75 in January for just $10 includes a fun and pretty exclusve paper collection, a super stamp set and Gold Foil Stickers! (Retail Value over $37 AUD) You also have the option of an additional Kraft album for $5 saving you even more. (This means you will receive over $52 AUD / $62 NZD worth of product for only $15 if you purchase the kit with the accompanying mini book! ) Be sure you do not miss out and see your consultant about workshop offerings using this kit. Remember, this deal is only available for January, so make sure to get your own Year >> Noted paper kit today for the perfect start to a crafty year!
If you have hopped in from Michele Rowley You are in the right place. The blog hop is a great big circle, so you can start here and work your way all around. If you get lost along the way, you’ll find the complete list of participating consultants on Melinda’s Blog:
We have approximately 20 Close To My Heart Consultants from across the globe sharing their creations using Year>>Noted and other great CTMH products on their blogs. This is simple to do – just click on the link at the end of the post on each blog to move to the next one! Here we go!

The year noted kit has Card stock, B and T Papers, gold foil stickers, a stamp set and if you get it a mini album as well.
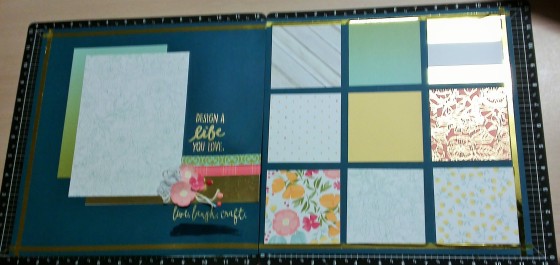
I am excited about the papers and this stamp set! From this kit I have made a double page layout with leftovers from my first project which was putting together the mini album. I have added 2 pages of Kraft paper to do this.
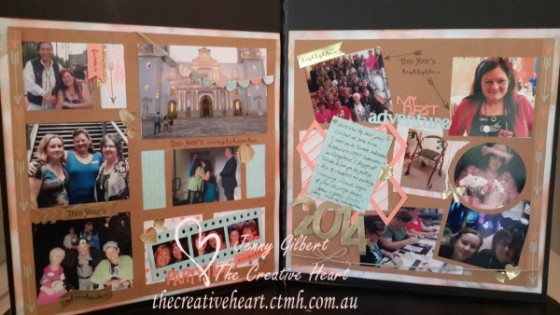
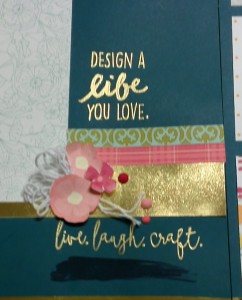
Of Course I began by distressing y white edges! I used Glacier and Sorbet inks for this.

I cut two overlays from Artbooking. The one on the left is the Shift overlay p77 . The one on the right is the Shift Overlay from page 87. I did these using kraft and made them as big as I could within the 12 inch space. A tip here – ensure you have a sharp blade. Kraft is not so easy to cut. Cashmere would do as well as Kraft.
I then did the hardest part of this project – choosing a few photos to reflect enough on the incredible year I had in 2014 without wanting to scrap the whole story all over again! I decided 3 key events and one thing I bought were must haves – the big adventure to Mexico and Convention USA, getting acknowledged as Sr Executive Manager at the Australasian Convetion, having an awesome team who help me run great events, and my best buddy who never complains about helping and carrying anything including suitcases, my walker, Rex. To make it even harder, the photos needed to work on the places available in the mats. it took a while but by adding one at a time, and filling gaps with Year Noted prints I was able to fill it all in. Then it was time to decorate. I love Bonding Memories glue for adhering tricky spaces and made use of it here too.
Here is a closer look at some of the detail on each of the pages. I used the foil stickers, sometimes on their own, sometimes stamped. To stamp these you will need to use your Stazon Ink. Don’t forget to get Stazon Cleaner as well! Our journalling pen did not stay put so stamping them is your on;y option unless you want them plain.

I cut some extra pieces from papers in the kit including the film strip – just to squeeze a couple more photos onto the page!


Use the scraps to make a neat banner of celebration with the little stamps!
Here is my favourite spot on this layout. I filled the space with B and T paper, I cut the diamond piece to represent the kind of stringed notice board we see around, then used the lines on the Year>>Noted stamp set to journal on some more of the papers. This is my favourite part of this whole kit and stamp set.…(yep I am excited) …..a clear well spaced set of journal lines to stamp! I just know this stamo might live permanently on a block because I an an avid believer that you need to journal all these pages! It does not solve the problem of me always running out of space, but it does solve the problem of wanting a little neatness that comes from having lines to write on! (I truly cannot be bothered typing, printing, cutting and pasting – writing by hand is much quicker!)

My 2014 was cut at 2 inches with the Cricut using Artiste font. I swamped each letter in Versamark ink and then in gold embossing powder to heat set. I tipped the embossing powder in a muffin case and swished the inked letters in it. A very fine tweezer helped me to get this job done. The excess was easily tipped back into the little pot. I used the two zip strips down each side.
I had fun making the page and it really did get me thinking about how good 2014 was for me. I am truly grateful to those I met along the way for making it wonderful!
Products Used:
Now “Hop” on over to Brenda Lapp’s Blog to see her work! Be sure to visit all the Consultants at their Blogs to get some great crafting ideas and other fun ideas! Remember, with a qualifying purchase of $75 AUD, you are eligible to purchase the exclusive Year >> Noted paper kit (which has a retail value of over $37 AUD for only $10—that’s over 80% off retail! Or, for an additional $5, you can order the Year >> Noted paper kit with an accompanying My Creations™ kraft mini book. Take a look here at our video about this awesome product. Contact your CTMH Consultant (or click here) to see how you can get this stamp set at a discount!
Thanks for stopping by