27

September Stamp of the Month

Welcome to the Australasian Stamp of the Month Blog Hop featuring the first of our new stamps S1509 Paper Garden.  If you have come from

Leah Cameron – Leah Cameron’s Corner  you are in the right place. If you landed here by accident, no problem, please join in by following the link at the end of this post.


AUNZ blog hop

Today I would like to share with you this (your creation) which features September Stamp of the Month Paper Garden available exclusively throughout September for $27 or for just $7.50 when you spend $75. S1509 Paper Garden

Paper Garden available now from http://www.thecreativeheart.ctmh.com.au

I have create my card using the pigment inks on cricut cut flowers following the cricut cut directions on the stamp set. I love the wire stamp! I stamped the whole stamp with Desert Sand from the Basics Pigment set. I have used a light and dark green for the leaf stamp (I love blending two pigment colours on a stamp this way) and stamped the flowers with Gypsy and Honey. I have daubed the edges. The wire is stamped in Slate.  The flowers were cut with the cricut Artiste Cartridge. Congratulations is stamped in Smokey Plum (just retired) and I mounted the card on Smokey Plum Base cards cut at 11 x 4 1/4. I was very excited my new Gold Foil had arrived so I was able to add that to the finished card along with triangle studs. You can’t see the foil well in this image but trust me it is not a black strip!

paper garden SOTM thecreativeheart.ctmh.com.au

I do apologise for this rather short and sweet post – not my usual form but I have not allowed myself enough playtime with all the awesome new product being released today.  I have used Cardstock, Pigments inks and the Stamp of the month, all available from my online store today with the awesome release of the new ideas book! Remember paper garden is available for September only and is just $7.50 with a $75 order. Shop any time right here. Hop along and have a look, or hop along to Shaunna Richards Passionate Aboout Pages and see the awesome artwork she has for you.


Please leave a comment before you go!

jenny sig

19

August 2015 SOTM Blog Hop Framed

Hello and welcome to the Close To My Heart Australasian Blog Hop for August. If you came from Britt McDonald  Crafty Connections Australia  you are in the right place.  If you landed here by accident, no problem, please join in by following the link at the end of this post. Today I would like to share with you a creation which features Close To My Heart’s Month Stamp of the Month for August – Framed.

Framed August SOTM


1508-sotm-card


I

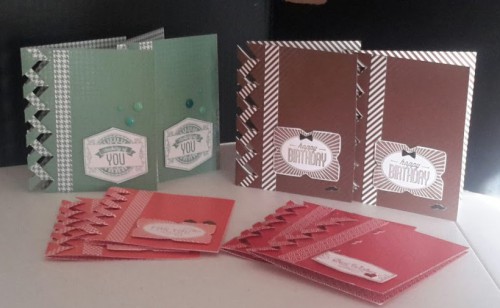
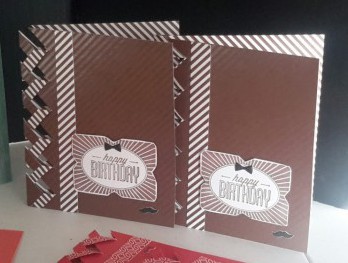
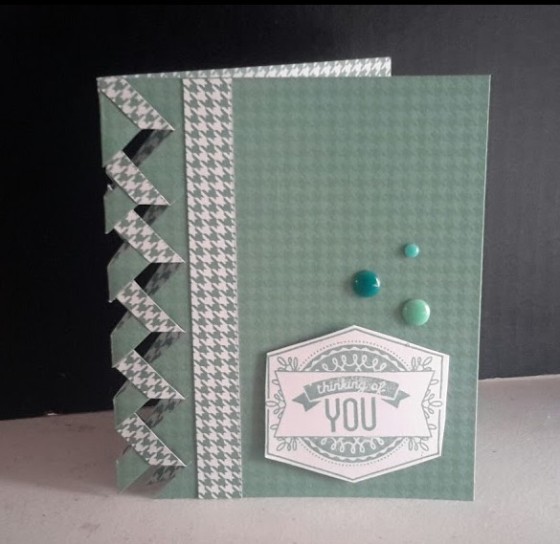
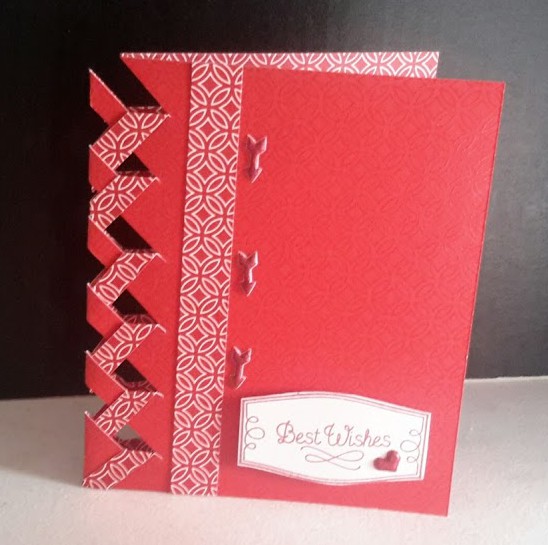
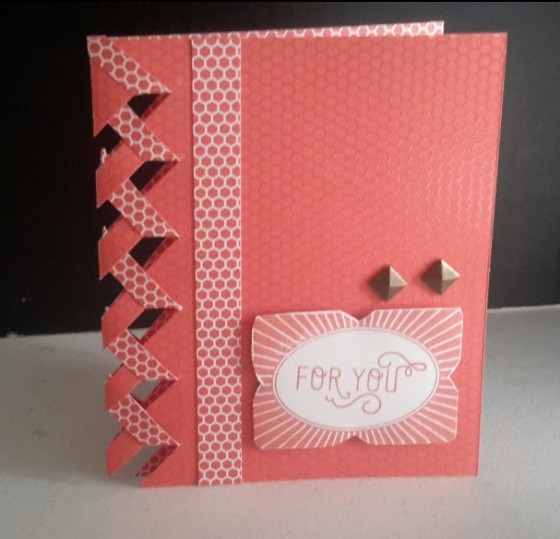
love this card making stamp and also am a big fan of our Fundamental papers. I have decided to combine them both to bring you this card design and Variations. Each car was cut at 4 1/4 inches x 11 inches, the same size as our standard cards.

August SOTM Framed Available from thecreativeheart.ctmh.com.au

August SOTM Framed Card collection

August SOTM Framed

August SOTM Framed

August SOTM Framed

August SOTM Framed

August SOTM Framed

August SOTM Framed

August SOTM Framed

August SOTM Framed

The ‘how to’ for the braided card can be found over on You tube right here I forgot to cut away the first piece and add it to the gap at the top but they worked out ok with the dual sides and using scraps for the coordinating sentiments. For the sentiments I simply stamped in the matching ink colour to coordinate with the Fundamentals paper. I have embellished these cards with a variety of leftover coordinating bits some of which are are unfortunately NLA. You are sure to find something appropriate in your stash and in our While Stocks Last section of our online stores. Don’t forget August is also the LAST MONTH of the current Idea Book. Ask us about what you need from it before it is gone forever!

This exclusive Framed  Stamp Set stamp is only available during Month of August. It can be yours for just $5 with a qualifying order of $75 or for $29.00 if ordered separately from your CTMH consultant.   If you do not have a consultant please contact me or place an order at The Creative Heart

I’d love you to leave a comment before heading off to the next stop, Denise’s Blog Scrap Stamp Share

CTMH Products used in this project include Fundamentals Adventure and Basic collection papers, exclusive inks, and White Daisy Cardstock, I especially enjoyed the precision of our Non stick Microtip scissors to create the braids.

Confetti Wishes Exploding Card with a cupcake!

A great big Happy Birthday to CTMH as we celebrate #30yearsofhappy stamping and enjoy the FREE stamp set with 30 mini stamps! This month I am also featuring all things Birthday at my Monthly crop and the best paper collection for this lind of celebration is Confetti Wishes.

Birthday Explosión box

Birthday Explosión box

I have created this exploding box card for display and inspiration at my upcoming workshop on September 21st. (If you are local be sure to book now!). This piece showcases what we can achieve with Confetti Wishes X7189B paper, the Artiste Cricut cartridge and our awesome Pink glitter paper Z1792!

If you have not tried the glitter paper out yet then I suggest you do. It doesn’t flake and cuts clean on the cricut with blade set to 6 and doing a double cut as I did for the title here. Slow it down for intricate designs, and lift carefully from your mat. If it is really a really sticky mat you will need the spatula.

1410505545045


There are a lot of tutorials on exploding box cards so I will not detail that here. For the cupcake I cut a cupcale holder from artiste at 4 inches. I guestimated the size I needed and it worked out just right. I stamped and embellished this before folding it with ‘Gliitter girl’ from Glitter Glam B1465 and the foliage from ‘Love This’.B1432. I sat a 3 inch styrofoam ball in the cupcake holder and covered that with double sided tape and removed the covering from the tape leaving sticky side ready for use.

Time to decorate the cup Cake!

Thoroughly wet 3 1/2inch pieces of Thistle card stock and scrunch each one up. Gently unfold these and lay them on the open double sided tape on the top of the Cup Cake. It won’t stick while it is wet – just position it , prod it, move it till you are happy with the look. (Dressmakers pins will hold it if need be) Here is the trick….Allow to dry overnight. By then it will be stuck and nice and firm again for you to play with.

1410505229588

Add a touch of Bonding Memories glue 1512 around the top of the cupcake rim and over the iced top. Sprinkle with glitter. (My messy mat  – All purpose Mat Z2045 helps make this job much easier to clean up!) Add something on top, some Bitty Sparkles Z1263 and you are done. I have adhered the cup cake to the card by stacking 4 layers of 3D foam tape Z1151 in the centre of the card so the stack reaches the bottom of the styrofoam ball. On the lid of the box I have used sponge daubers and more glitter to finish it off. 

Glitter Paper Tip

I have found the stickers are not staying put on the glitter paper. The answer to that problem is liquid glass.!!! Our answer to anything that needs to be Stuck! 3D Foam tape also works well on this surface. 

Shopping list – Note – this shoping list entitles you to add – Free #30yearsofhappy stamp and Stamp of the month Family is Forever! – That is and additional $48 worth of stamping fun for just $5!

You might also need these inks – Thistle, Canary and Pacifica.

Additional Supplies – available as 50% off host reward items

Thank you for stopping by. I would love to have some feed back in a comment before you go! I hope you are inspired by this project. If you are local to Mildura and would learn to make one of these in a class setting please let me know in your comment below. Don’t forget our workshop is coming up. Here is a sneak peek.

1410505656103

You can order all you need online right here. Be sure to join my September Virtual Gathering to be in the draw for the Host rewards. Happy Stamping Month! 

Jenny

jenny sig

3

Everything ABC’s Blog Hop R is for Remember this Day

abc bloghop

Welcome to the Everything ABC’s Blog Hop! For this hop we will be featuring the letter R. This may be the name of a paper, a stamp set or an embellishment. Whatever the crafter has chosen as their # element will be featured in their post. If you have just hopped onto my blog, please start at the beginning at Linda’s blog ~ Scrappy Therapy  If you came from “Linda’s blog ~ Scrappy Therapy ” then you’re on the right track!

R is for Remember this Day

Recently I my family lost someone we loved dearly and I wanted to give all the members of the family a card to express both condolences and the encouragement to remember a great lady with love. I created this card for all the immediate family and granddaughters who were effected by the loss.

Remember this Moment

Remember this Moment

In our range of stamp sets we have a lovely Cameo set called ‘Sweet Moments’ C1467. I fell in love with it and got it as soon as possible and stashed it into my card making pile, to wait for a day of inspiration for using it. (I love doing heritage work!) I needed little inspiration when I had a need to express my love for a beautiful lady and the loss the family were suffering. On this stamp set I found the Cameo and all it represents in femininity, lace, delicate and nostalgic and sentiments such as ‘Remember this day’, a butterfly, and a lovely tiny saying ‘It’s moments like this we want to hold in our hearts forever’.

20140905_223832

Sweet Moments C1467

I have teamed all of these with two core (I think at least) card making stamp sets. Sincere Expressions A1146 and D1584 Big Hug. The card itself can be simply stamped but I decide to be a little creative and have embossed with Cameo with clear embossing powder. I finished the work with Clear Sparkle flourish, Small Sparkles and Silver Shimmer trim. I stamped the Rose on the envelop as an added touch of elegance.

Sincere expressions A146

Big Hug D1584

It is hard to say I hope you enjoy this project, but sincerely hope you are inspired by it to give this stamp set a go for when ‘Remembering’ a special someone really matters.

Products Used in this project

Your next stop on our Everything ABC’S blog Hop is Lauren Moore – “CTMH Craftings” 

In case you get lost along the way…go to Linda’s blog ~ Scrappy Therapy for a complete list of participants!

Jen

jenny sig


New Product Feature – Chalk it up!

New  product blog hop

1688930_10151786132052574_233543346_n

I will confess right now for those of you who don’t know. In my formal job I am a teacher. Being a teacher is in my soul. Mother tells me I used to play ‘school’ with my little brother. So when CTMH brought us a paper pack and a Picture my Life pack called Chalk it up naturally even at 51 I am excited and also quite nostalgic since we do not use blackboard and chalk anymore. Who can remember a teacher who was really good with her artwork on the chalk board? I wonder if these are the reasons why chalk boards are currently also popular decor items!

Now if you really like this new Chalk it up kit it is the kit currently included in your Consultant kit!

new consultant kit – just $130 plus $19.50 P and H contains $500 worth of product including Chalk It Up WOTG AND Tthe Fore Always PML KIT! You get inks, blocks, embellishments, a n E size alphabet stamp set, some markers, some washi and more!

The Chalk It Up WOTG kit gives you all the instructions you need to create this page layout

Here is some additional some artwork I have done with Chalk it up WOTG and Chalk it up PML.

Pages and cards using the Chalk it up collection

Pages and cards using the Chalk it up collection

You can see the papers on page 26 of the Annual Inspirations Idea Book or check them online here. Contact me (see below)  if you would like a hard copy of the new Idea Book. I have also used the Chalk It Up Picture My Life Z2018 program on the page layout. This makes for speedy decoration of a page!

You can see the WOTG kit (workshop on the go kit) on page 28-29 and the host rewards stamp Better With a Friend D1608 is on page 11. You will not find this stamp online as it is exclusive to our gathering hosts. Be sure to talk to me about our broad range of gathering options.

I have also used the lines, titles and graduation cap from the Teacher Appreciation Stamp D1612 on this page layout.

At this time of the year with Year twelve students only 12 weeks from graduating now is the time to get organised with your school graduation photos and thank you gifts for teachers. Teachers do not often get a thanks but they sure do appreciate it when they do. There are some ideas in the Idea Book for you to follow. The bunch of pencils is an awesome ideas as I remember forever handing students a pen or pencil because they ‘forgot theirs at home’! 

You will find the Great Job stamp set C1588 and card on page 32.You can use this stamp set to congratulate your child or anyone else for that matter, on a job well done! I am going to be teaching the techniques from the card displayed in the idea book at my Tuesday Technique class.

I have also used the owl from this month’s Stamp Of The Month What a Hoot S1408. This stamp set is only $5 with every $75 order.

To view and purchase any of the products in this range of artwork click the links below to head to my online store to place your order. Be sure to join my August Online Host gathering  to go into the draw for the host rewards at the end of the month! (you could get Better with a friend for free!)

Here are some more ideas with Chalk it Up

Shadow box frame put to use to encourage your child’s success


Powered by Linky Tools

Click here to enter your link and view this Linky Tools list…


5

Everything ABC’s Blog Hop N is for Northern Lights


abc bloghop

Welcome to the Everything ABC’s Blog Hop!

For this hop we will be featuring the letter N. This may be the name  of a paper, a stamp set or an embellishment. Whatever the crafter has chosen as their N element will be featured in their post. If you have just hopped onto my blog, please start at the beginning at Linda’s blog ~ Scrappy Therapy

If you came from “Ren’ee Musgrave~ReneesCreativeQueens ” then you’re on the right track!


N is for Northern Lights technique. 

Hello readers! I have landed back in Australia safe and sound after my awesome adventures overseas and I am looking forward to sharing more of that adventure with you in coming weeks. For now I am back on board with the everything ABC’s Blog hop and I hope you enjoy my N project, northern lights which I took with me to Convention in Anaheim for the Consultant Showcase. There are number of videos about this technique and I watched a few before trying it myself. I hope you enjoy my instructional video in and will have a go at replicating the technique of scrubbing and rubbing just with your $2 sponge!

Let’s get started by looking at some samples! Bring on the eye candy!

Always Grateful C1559

Always Grateful C1559


Always Grateful C1559 Use a toothpick dipped in pearl paint or the Chalk Marker to create the sparkle of stars.

Always Grateful C1559 Use a toothpick dipped in pearl paint (NLA) or use the  Chalk Marker to create the sparkle of stars.


Cityscape C1563 retiring July 30 2014 so be sure to grab this one!)  This is one of the pieces I had on show at Convention 2014.

Cityscape C1563 retiring July 30 2014 so be sure to grab this one!) I had this one on show at Consultant Showcase at the Convention.

Do something really different. Hello Tweety B1420

Do something really different. Hello Tweety B1420 – (NLA. It appears to already have been retired!)

Hello Tweety B1420 with a background using the Damask Embossing Folder Z1927

Hello Tweety B1420 with a background using the Damask Embossing Folder Z1927

So how is it done?

You start with your inks all lined up – Honey, Topiary. Indian Corn Blue, Hollyhock, Outdoor Denim and Black. You will need the sponge to apply the ink and you simply rub the sponge on your inkpad and rub the ink onto your paper. You are rouging it scrubbing the ink into your White cardstock. Rub and buff!!!  It is easier to show you how so here it is!


Tips!

  • Work on scratch paper so you can work well over the edges
  • Do a bigger piece than what you need
  • Work one colour then the next
  • Begin with a kind of diagonal line
  • smudge colours into each other to create more colours including purple! This works especially well if you are quick
  • don’t fuss too much with placement – every time you do this it will be different to the last
  • Change it up – make it lighter and brighter, leaving out the dark colours, adding more of one colour than another and more.
  • It is recomended to use sihouette type stamps for this technique hence the trees and the city scape. But I challenge you to try other stamp sets such as Hello Tweety, Fast and Furious and Born to Ride!
change it up - leave out the dark colours!

Change it up – leave out the dark colours! This was an experiment – it is currently a UFO! I am in temp accommodation with a temp craft room so it is unfinished as yet!

Here is a picture of the finished artwork I was working on in the video featuring Born to Ride C1483. It is finished off with the Durable Studs Z1836

Born to Ride completed- as shown in the Video

Born to Ride completed- as shown in the Video

Shopping List

You have reached the end of the blog hop but you can start over or continue at your next stop on our Everything ABC’S blog Hop – Linda Norman of Scrappy Therapy

In case you get lost along the way…go to Scrappy Therapy for a complete list of participants!

6

Everything ABC’s Blog Hop Letter I

abc bloghop


Welcome to the Everything ABC’s Blog Hop!

For this hop we will be featuring the letter I. This may be the name of a paper, a stamp set or an embellishment. Whatever the crafter has chosen as their I element will be featured in their post. If you have just hopped onto my blog, please start at the beginning at Linda’s blog ~ Scrappy Therapy

If you came from “Joy McHargue- Studiowow” right track!

Ivy Lane Card Collection

Collection of 12 cards all made with Ivy Lane Card Making kit and extra papers and stamp sets

Collection of 12 cards all made with Ivy Lane Card Making kit and extra papers and stamp sets

With mother’s day coming up for the mother who has everything consider making her a box of cards. These cards are all making use of the Ivy Lane Card Making kit, additional Ivy Lane papers and various other stamps sets and tools. The card box is also decorated with Ivy Lane papers, the Ivy Lane Assortment, Ivy Lane Complements and the stamp of the month we had earlier in the year called Happy Place. This project is one which should have you diving through your stamp sets!

Ivy Lane Card Making Kit – The ONLY way you can get that awesome gold Shimmer trim at present.


Aside from three of the cards being exactly as they are in the kit I made additional cards, first varying the card making kit deigns, then diving into my stamp stash and using my scraps and leftovers. All card are on Colonial white cards and since having these in my possession I have fallen in love with the quality of these cards, and the price.

10-P1030170

This is another that follows the designs in the card making kit but makes use of a different sentiment. Once again you can see the soft flourishes stamped in the background.

03-P1030163

In this card I have followed the same design that is in the card kit but used an alternative sentiment.

The following two cards focused on using up some zip strip and chipboard pieces.

09-P1030169

The Chipboard piece came with Art Philosophy Cricut Collection. Sentiment is from Joyful Birthday. I glued the Ivy Lane Green to the chipboard first.

08-P1030168

The banner is one of the colour ready pieces that comes with the Art Philosophy Cartridge. Sentiment is from Joyful birthday. I used the zip strip from the papers to trim this card.

Emboss any scrap and trim it to fit!

07-P1030167

For this card I used the Damask Embossing folder and then sanded. The Sentiment is in the Flourishes stamp set.

Make specific design choices with stamp sets from your stash.

05-P1030165

Background stamp the Flourishes from the inspiration flourishes stamp set, and stamp the hearts from the dreamer stamp set once on the card and once on scrap card to cut and mount on top. Sentiment is secondary stamped in chocolate and then stamped in hollyhock. The end result is a very pretty card.

04-P1030164

The Cup Cake is Cut with the Cricut Art Philosophy cartridge and layered up. The sentiment is from Joyful Birthday B1419

02-P1030162

Joyful Birthday B1419 Flourishes from Inspiration Flourishes C1581 in Bamboo and Hollyhock. Damask Embossing folder has also been used.

01-P1030161

I used the cuts suggested in the Ivy Lane Card making kit and gold shimmer trim. The title and chipboard piece came with the Artiste Cricut cartridge, background stamped with Inspiration Flourishes in Bamboo Ink. The edge distressing is in Hollyhock and the sentiment is stamped in Cocoa ink

I hope you have enjoyed this little trip down Ivy Lane! Now Hop on over and see what Pam Trostle has in store for you


Product list – All products available online at my Close to My Heart Online store– Don’t forget it is National Scrapbook month so you can get the Free to be me paper pack with every $75 order!

Ivy Lane Card Making Kit G1079

Ivy Lane Paper pack X7178B

Ivy Lane Complements X7178C

Ivy Lane Assortment Z3001

Colonial white cards and envelopes value pack X1410

My Creations Card Box z1647

Cricut Collection Art Philosophy Z1686

Cricut Collection Artiste z1790

Damask Embossing Folder Z1927

Exclusive Inks – Bamboo, Chocolate, Hollyhock and Cocoa

Additional Stamp sets

Joyful Birthday B1419

Dreamer B1439


1

A Very Happy Mother and great savings for you!

mothers dayI love Mother’s Day. (not just because I was born on that day!) It is a time to celebrate the awsomeness that comes from being a Mum. Imagine the pleasure of Giving mum a hand made card? Or even better a lovely photo wallet? (stay tuned – that post is coming)   CTMH have this lovely stamp set we can use for Mothers day cards and mini photo albums to celebrate and thank our mums, or even give to someone who is a mum in spirit, or perhaps someone who we know is under-appreciated as a mum. A nice little old fashioned snail mail card could just make their day!

Mother’s Day Stamp Set C1577 Just $19

This stamp set is C1577 and you will find it on 86 of your idea book. ( Email nenifoofer@gmail.com if you would like to order one. ) You can take this link to get right to it online. The most difficult decision with this stamp set is which of the four silhouettes to use and what sentiment for inside – are we all likely to ‘quote our mother’s’? Are we like Dad’s only smarter? I love the elegance of this design and it teams well with  the lovely Ariana papers.


Ariana Paper Pack – Just $14


The card is simple and easy to make and I have FREE kits packed and ready to go. All you need to do is book a home class (if you are within cooee of Mildura), or include this stamp set in your order of $75 or more at  my online store and I will send you the kit free of charge. This offer is limited to April purchases only.

While placing your order make it worth your while to SAVE by getting the Balloon Talk Stamp of the Month and the Free to Be Me Paper packs, BOTH just $5 each with orders totalling $75. That is a saving of over $30 for your crafting pleasure! Through May I will be posting projects you can do with your Free to be me papers so watch out for those!

Balloon Talk April Stamp of the month.

Free to Be Me National Scrapbook Month paper packet - just $5 with every order over $75. This is pretty and exclusive, available only for a short time.

Free to Be Me National Scrapbook Month paper packet – just $5 with every order over $75. This is pretty and exclusive, available only for a short time.

I am really looking forward to sharing this with you in upcoming classes or by post. I will show you the photo Wallet project in my next post. Stay tuned!

Jenny


8

CTMH Stamp of the Month: Happy Place S1403A Australasian Blog Hop

Hello and welcome aboard our Stamp of the month Australasian Close to My Heart Blog Hop. If you have arrived here from Patricia’s Blog then you are in the right place. If you landed here by accident, no problem, please join in by following the link at the end of this post.

I love our March Stamp of the Month. (SOTM) We can get ahead and create some Mother’s day cards, or simply celebrate the unique bond of mothers and daughters with this month’s SOTM Happy Place. I decided to work with a project that would give you plenty of time to complete in time for Mother’s Day in Australia and it all begins with a box and some scraps! March Stamp of the Month Happy Place S1403A available exclusively throughout March for $24 or for just $5 when you spend $75.

Ivy Lane Card gift box

The completed gift box filled with hand made cards ready for your mum or special friend to send on call. What a lovely hand made gift this will make!

The completed gift box filled with hand made cards ready for your mum or special friend to send on call. What a lovely hand made gift this will make!

I am using leftover bits and pieces from my Ivy Lane WOTG kit, Ivy Lane Card making kit, Ivy Lane Complements and Ivy Lane Assortment , and the colour ready Card Box. Of course you will also need the SOTM My Happy Place S1403A

21-20140226_193759

They say in patchwork (and building)  to measure twice and cut once. I need to remember that as it did take me several goes to get the base on the lid and flap of this box. Ideally your piece will run right over the back to the bottom. I had already glued a piece to the back so I couldn’t do that. I will give you the measurements I used but please be aware some fudging is required. The box lid is slightly wider than the base. I had to trim an extra smidge to get a nice fit as I went through the process. There is also absolutely no reason you couldn’t use even smaller pieces of varying sizes of scraps and mix and match to decorate your box. The key design elements here are the top piece of B and T paper, with Babushka Mum and baby dolls and the flower cluster. The rest has been created to coordinate with that vision.

Top of the box art work

Top of the box art work

Ok so looking first at the top, I cut the focus B and T paper – the lovely one with pale ink tones and handwriting – and cut it to 6 x 4 1/4 inches. The Hollyhock piece is 6 1/2 wide and 5 7/8 long. I do try to avoid 1/8 of anything. Here I found that to be slightly too long but not even an eighth and to cut it at 5 3/4 it would have been too short. By flipping the box over onto the lid I was able to fudge the fit trimming a smidge away with a craft knife.

18-20140226_201552

Fudging the fit by trimming a smidge using a craft knife and the versamat.

Now this lid opens and closes – so every fold needs more than just one score line to accommodate it. Once again paying attention to the placement of your measure – having the paper the right way around – score at 1 1/8. This will be the the bit that comes own the front over the magnetic flap on the box.

The CTMH ruler has a steel edge and 1/8 markings making it easy to measure that little 1/8

The CTMH ruler has a steel edge and 1/8 markings making it easy to measure that little 1/8

On the back I placed a piece 6 3/8 x  2  1/4 wide and did a smidge of trimming again.

I did not like having an open edge at the back. It was a bit like missing cornice or skirting boards in your house. I tried washi tape but didn’t like the result with the colours I had so I went for the Gold Shimmer trim. This shimmer trim is currently exclusive to the Ivy Lane Card making kit – and you have heaps of it left after making the cards, so why not use it here right? OK – that fixes the seem and is strong enough in bond to hold well. I fixed all these papers to the box with Bonding Memories glue.

17-20140226_201644Around the front and sides of the bottom of the box I simply looked at the strips I had – the center one was about 1/2 inch too short to go all the way in 2 pieces. I glued these from the back to the front on each side – I had a plan to cover the gap. The bottom has the lovely strips in the Ivy Lane Complements pack. The top is more of that gold Shimmer trim. I picked a flower from the Complements sheet and the bottom was done.

Next I focused on decorating the top. I decided to work with a paper piecing technique. I stamped both the mother and baby dolls on three different colours of scrap B and T Duo and once each on white card stock. I fussy cut the pieces and then played dress ups. I tried several different colour ways and ended up going with the one you see finished here.

stamp the images several times on different papers. Experiment a little.

Stamp the images several times on different papers. Experiment a little.

The Cutting diagram will show you the different ways you can cat these designs. If necessary you can re ink the edge of pieces. There are 5 key parts – the body (which can be the whole) the apron, the head scarf, the tie and the face. On Mum there is also her flower that can be cut separately. For all dolls it is also possible to separate the hair, but I found it easier to colour this part with watercolour pencils. 

Cutting chart.

Cutting diagram.

Fussy Cut

Fussy Cut

Dress rehearsal

Dress rehearsal

When you have all your pieces trimmed out do some dress rehearsal. Experiment a little with colour combinations until you are happy with the result.

Colour up a little with a light shade to take the stark whit away. I used sorbet for the face, Purple for the eyes and Brown for the hair.

Colour up a little with a light shade to take the stark whit away. I used sorbet for the face, Purple for the eyes and Brown for the hair.

Glue them all together Re ink edges if cutting took too much black outline away.

Glue them all together Re ink edges if cutting took too much black outline away.

carefull trim vey small pieces f 3D foam tape for the flower and the scarf ties.

carefully trim very small pieces f 3D foam tape for the flower and the scarf ties.

Once the Babushka dolls are ready it is time to plan the floral cluster. In making my Ivy Lane page layouts I cut extra flowers for the pages. I have made these more dimensional by gently rubbing in the center of them with my bone folder on the back of the versamat. This makes the petals pop upward, just like magic.

gentle circular rub and up those petals will pop

A gentle circular rub and up those petals will pop.

I layered these together to create the paper flowers on the box. It is now time for rehearsal again. Experiment with the placement of the dolls and flowers. I like to back a group of flowers with greenery and the swirl from the Ivy Lane Complements was perfect. Take care removing it from the sheet with all the curly bits. I placed this first, then my dolls, then my paper flowers. I then used the flower assortment that came with Ivy Lane WOTG. Be careful with these – cut the bit of sheet they are on to experiment rather than pull them off the backing. The adhesive is strong. If you put them in a place then change your mind you may be too late. I decided the pale pink ones did not work in this design so I left them out. I finished with the purple glitter gems.

This image is showing you the different heights and dimensions of the finished project

This image is showing you the different heights and dimensions of the finished project

I chose the Like Mother Like daughter sentiment. I stamped black on white and used a dauber loaded with hollyhock to soften it and pink it up and mounted this on a bit of the pink Ivy Lane B and T paper. I have already made my Ivy Lane cards so I popped them in the box and voila, the gift is finished.

Here you can ee how i covered the gap at the front of the box way back when I started this project.

Here you can ee how i covered the gap at the front of the box way back when I started this project.

Ok – Sorry this was such a long post but I hope you can get though the instructions! Here is another look at the finished box to save you scrolling back to the top

The completed gift box filled with hand made cards ready for your mum or special friend to send on call. What a lovely hand made gift this will make!

The completed gift box filled with hand made cards ready for your mum or special friend to send on call. What a lovely hand made gift this will make!

Want more Piecing? How about this example using Skylark

Pieced card using Skylark scraps

Pieced card using Skylark scraps

SOTM Happy Place is only available until 31st March from your CTMH consultant. I’d love you to leave a comment before heading off to the next stop, Mandy’s Hall of Indulgence . Happy Hopping!

Shopping List

WOTG Ivy Lane G1073

Ivy Lane Card making Kit G1079 This is where you will find GOLD shimmer trim!

Ivy Lane Complements  x7178C

Ivy Lane Assortment Z3001

Purple Glitter Gems Z1936

Stamp of the Month – Happy Place

My Creations Card Box Z1647

Watercolour Pencils 3505

Exclusive Inks – Black z2105

Bonding Memories Glue 1512

3D Foam Tape Z1151

Art Philosphy Cricut Collection (Use to make the flowers) Z1686 

Tools – Versamat z1279 Bone Folder Z1204 Ruler Z1471 

12

Everything ABC’s Blog Hop D is for DREAMER

abc bloghopWelcome to the Everything ABC’s Blog Hop!

For this hop we will be featuring the letter D. This may be the name of a paper, a stamp set or an embellishment. Whatever the crafter has chosen as their # element will be featured in their post.

If you have just hopped onto my blog, please start at the beginning at Linda’s blog ~ Scrappy Therapy

If you came from “Catherine Nowak ~ Catscrapbooking” then you’re on the right track!

CTMH have some awesome products that support projects related to encouraging those we clove and ourselves to embrace our dreams. We have a gorgeous new Dreamer Stamp set ( B1439) and our fabulous Dreamer style (Z1976) sheet that goes with the Base and Bling range (P 80-81 of the Feb-July 2014 Ideas book) So Imagine if we draw those two products together to create the perfect gift for a teenager with a lovely necklace to encourage dreaming and a card to go with it. This is what I have for you.

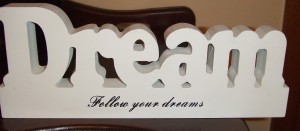
Dreamer Stamp set and Follow your Dreams Base and Bling - an awesome gift making combination.

Dreamer Stamp set and Follow your Dreams Base and Bling – an awesome gift making combination.

The Cards

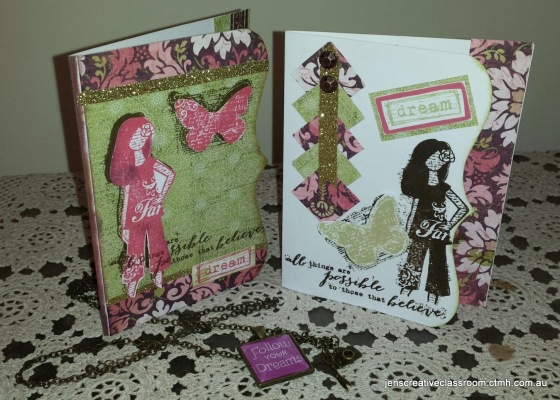
Both cards are made on White Daisy die cut cards Z1473. I LOVE the quality of CTMH blank card bases!  To complete both of these cards i have used leftover papers from the Ivy Lane Card making kit. I have used the strips and scraps in a number of ways.

B1439

Card One

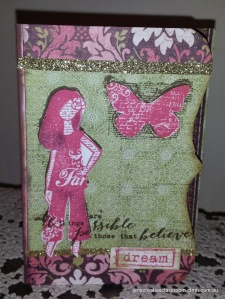
Card one- Pink Dream Diva

Card one- Pink Dream Diva

For card on I stamped the Dream Diva girl and the butterfly with Hollyhock ink and fussy cut the actual figure out. I added a light smudge of Desert sand and even a spot of black to some edges. I was a bit short on the left so I have daubed this in the colours I had out. I stamped in the Ivy Lane Green print background in with the dream Diva and the butterfly in Black ink. This allowed the sketchy shadow lines of the stamp to still be there underneath the fussy cut piece. The pink Diva and butterfly were then monted right on top of this background images. I used the Microtip scissors for all the cutting including following the bracket contour of the die cat front of the card, The gold shimmer trim adds the nice touch of bling. At the time of writing the ONLY place you can get this colour shimmer trim is through purchasing the Ivy Lane card making kit. Dream is stamped in Hollyhock and smudged with a little desert sand with a dauber. The curved edge of the card is finished off with a dauber and Desert Sand.

Card Two

Here I have focused on a plain background with Ivy Lane accents.

Here I have focused on a plain background with Ivy Lane accents.

The elbow of the Diva fits nicely into the point of the diecut. The sentiment fits just snuggly underneath. Careful placement of the images is what you need here. I did the butterfly by inking in hollyhock, stamping once, reinking in sweet leaf – this gave me a more muted soft green colour which matches the Ivy Lane Green. You could do this by kissing too. Ink up the butterfly and another stamp such as a solid heart or lacy stamp inked in Sweet leaf. Stamp off some of the hollyhock first so it isn’t too strong. Kiss the butterfly with your second stamped inked in sweet leaf. It should look different to mine – and will almost always be slightly different each time you do it depending on the amount of ink and the way you kiss the stamps together.

I simply cut some scraps to make some squares and held them together with gold shimmer trim. The dots here are from the mini medley accents rosewood collection Z1857 Dream is stamped in swet leaf and mounted on hollyhock and the Ivy Lane green print. The curved edge is highlighted with a dauber laded in sweet leaf.

Dreamer Base and Bling

Base and Bling is a totally new product range for Australia and it truly is the fastest, easiest way to make nice dress jewelry for anyone including yourself. Pictured here is what I have made for myself.

7-20140218_141246

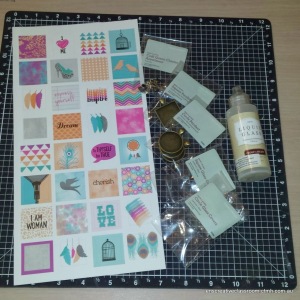
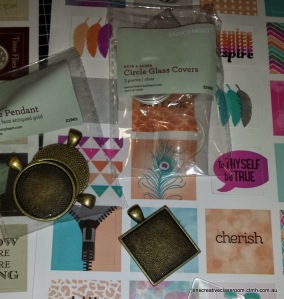
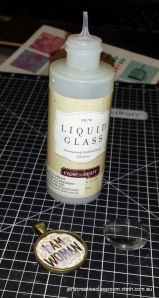
All you need is a chain, a square pendant, a matching glass,  one of the sticker style sheets, some Liquid Gloss and a baby wipe! If you like the charms you can add them too. Since I am crafty I have added the Craft Queen charms (z1958) to my necklace.

1-20140202_174001

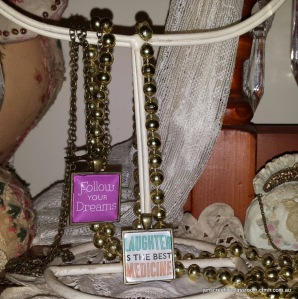
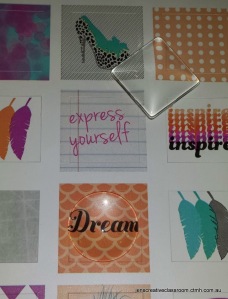
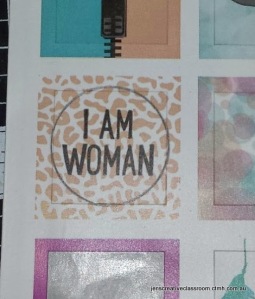
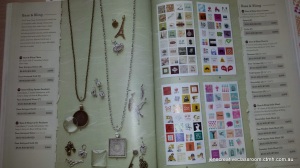
Pictured here is the Dreamer style sheet (Z7976) As you can see there are a LOT of designs to choose from and it would be very easy to make a few to add to my change depending on my mood and the message I wish to give myself for the day. Follow your dreams is the first one I made. I then made laughter is the best medicine. In the image below you can see how I can add them to a hanger and display them as part of my decoration on my dresser too!

2-20140202_173750

OK…so is it easy? You bet. Square ones are a cinch.

Make  a Dream necklace to go with your card

Make a Dream necklace to go with your card

2-20140218_211438

1. Peel sticker from the style sheet and place it into the square frame. Pres down firmly in the corners – use a stylus or similar for the corners. Put just 5 dots of liquid glass on the sticker – aim for near the 4 corners and the center. Grab your glass – try not to touch the back so a fingerprint does not become a problem and drop it into the square base. press firmly down. As you do this some liquid glass may escape – wipe this away immediately with a baby wipe. Your dots of liquid glass should have been big enough to spread and join with each other for an even coverage between the glass and the sticker.

Here is a way to test and try to see what you like and I have photographed how I made a round one for you step by step. If you have a desire for a round one you can trace and cut a circle as I have below, or you can use a 1 inch circle punch to get a nice circle. My hand cut circle is not all that ‘perfect’ but once the glass is in with its magnifying qualities the outside edge of the circle doesn’t matter.

7-20140218_211452

Test out the glass over a design

Test out the glass over a design

Use the round glass to trace a circle

Use the round glass to trace a circle

Ready to stick

Ready to stick

6-20140218_212254

Notice the 5 dobs of liquid glass

You can see the foru different desins and all the elements. The faux antiqued gold and silver in colour chain, the charms. and the styles sheets all on pages 90-91 of your Ideas book.

You can see the four different designs and all the elements. The faux antiqued gold and silver in colour chain, the charms. and the styles sheets are all on pages 90-91 of your Ideas book. If you do not have an Idea book you can check it online, or contact me to order one by post.

That’s it!   Thread it on your chain, add charms and wear it!! This is a very cost effective gift for anyone and takes very little of your time.

CTMH has given us a great video now too

1-20140218_231349

You can purchase all of the products used in these projects to make a sweet gift for someone who needs a special birthday gift, or some words of encouragement and support.

Shopping List

Cards

Base and Bling Gift

Thank you for stopping by. I sure hope I have inspired a gift to your special friends and family with these ideas.

Thank you for stopping by

2012_0824(023)

Jen

Your next stop on our Everything ABC’S blog Hop is Lisa Plummer – Flaunt Your Creativity

Here is the complete lineup in case you get lost along the way 🙂

**Find the lineup on the signup document**

1. Linda Norman- Scrappy Therapy 

2. Lauren Moore- CTMH Craftings

3. Michelle Battitori

4. Catherine Nowak ~ Catscrapbooking

5. Jenny Gilbert – Jen’s Creative Classroom

6.  Lisa Plummer – Flaunt Your Creativity

7. Cary Magnani – My Heart’s Design

8. Shalana Glass – Scrappin with Shalana

9. Pam Trostle – Pam’s Crafty Creations

10. Michele Pryor – Michele’s Ink It Stamp It 

11. Sharon Chapman – PaperFiesta

12 Anita Autore Cards and Coffee