Invitation to create and thrive with me in April 2014!

I can barely contain my excitement!!!

  • Hands up if you love free stuff?
  • Keep your hand up if you love using a Cricut in your scrapbopoking and love CTMH Cricut Collections?
  • Put both hands up and yell ‘me‘ if you do not yet have cricut machine but would LOVE  to be able to start artbooking and making awesome overlays or cute little boxes without spending a fortune!!!

I would love to hear you say that a bit louder…ME!  This post is for you! Close to My Heart has an offer for you that will be hard to refuse and I am looking for team members to support and encourage through April to get you creating and thriving!

Here is the deal. Join in April 2014 and get this awesome bundle of over $400 worth of goodies for just $130 plus $19.50 postage PLUS choose one of these cricut collections for FREE!!!  That means your investment is now worth $530!!!!

Conultant Kit $130 contains $400 worth of product and all you need to get started


You will also get 22% commission, a FREE website just like mine, free training, and one to one support from yours truly. Create and thrive with me! I am learning all there is to know about the business by attending Leaders conference, the Convention in the USA to be the best possible teacher and leader I can be.

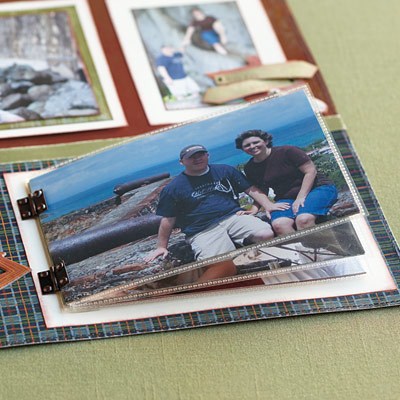
So let’s just take a breath for a minute – what is in a cricut collection?  Here is an example.

A cricut bundle such as Artbooking will have you overlay mad, Art Philosophy will see you creating cute cards and motifs and Artiste is the one you need to make jazzy little boxes, cards and more. Just like these ones!

14-ss-hostess-rewards-b1451

14-ss-hostess-rewards-b1446 cricut-artbooking-page 14-ss-ivy-lane-level-3


CTMH have a fabulous video series running at present called Artbooking Made Easy. Check it out and see for yourself what you can do with a Cricut collection. Remember…you can choose ONE of the three collections for your  free bundle when you join my team during April!


I would love to hear from you no matter where in Australia you are from. My team is already alive and thriving in three states and we have such fabulous online support networks and a sense of family that you will truly create and thrive no matter what your why for joining the journey with us is

Why Journey?

Becoming a CTMH consultant is the beginning of a fun and exciting Journey of fun, self confidence, and making new freinds. People join CTMH for many reasons. I have covered some of these on the Join My Team page. Whether you are looking for personal discount or wanting to build a satisfying ‘work on your own terms’ home based business, CTMH has something for you and welcomes everyone. I remember when I first started the one thing that caught my attention (other than our business manager appearing on stage as Buzz Lightyear!) was EVERYONE is welcome here. and I would love to welcome you to my team.

Is this a great deal? 

It certainly is. And here is the steak knives bit….it can be an even BETTER deal.   Your outlay of of $130 plus postage gets you an immediate $530 worth of product, a 22% commission, website, free training and access to consultant only products,  and if you are a goal setter, by completing the Straight to the Top program you can get your $130 back! That means your kit becomes free too!!!  What have you got to lose when you get all this product, support and new friendships?

You don’t have a cricut machine for the Cricut Collection ( but I bet you would love one!) 

I have good news here too. Did you know as a CTMH Consultant here in Australia you will have direct access to the importer and have the best buy deal from them to get the machine to go with your free Cricut Collection? Purchainsing a Cricut online can be dicey. This way you have 100% product guarantee. Many of us have enjoyed this service and reaped the rewards in our creativity. Furthermore, because we are consultants we are able to get those other collections at discounted prices! I can show you how to save as much as 50% on some items!

Want to know more? Check out these videos.

They say it can’t hurt to ask right? So I am asking you to complete this form below requesting  a personal contact call about this very special offer. If you join my team and you make it  Straight To The Top I have an extra special reward for you. It’s a wigwam….but worth it. Create and thrive with me!


9

Everything ABC’s Blog Hop Letter F

abc bloghop

Welcome to the Everything ABC’s Blog Hop!

For this hop we will be featuring the letter F. This may be the name of a paper, a stamp set or an embellishment. Whatever the crafter has chosen as their F element will be featured in their post. If you have just hopped onto my blog, please start at the beginning at Linda’s blog ~ Scrappy Therapy. If you came from “Pam Trostle at Pam’s Crafty Creations ” then you’re on the right track!

I’m a Flipping and a Flapping!

I am going to share with you today one of our most popular products and how I have used it to help fit dozens of photos into a double page spread. Flip Flaps come in a range of sizes, are simple and easy to use and solve the problem when you want to put more than four photos on a page. If you wish to skip the description and head straight to the video scroll down!

I had a big celebration last year, my 50th. Needless to say there were many many photos and while I advocate you do not have to scrapbook EVERY photo there were moments form this night I just had to put into the album. I have used flip flaps on a number of pages. I hope you enjoy this visit to my album.

The Big Bash page has 30 photos on it. Yep – 30. At first it has 4 – my siblings, my musician and my grandson. Pull the bottom flip flaps on both these pages and the party starts to be revealed. Lift the top and there is more. I made use of the sides for journalling and when you open them out there are even more photos. The full spread shows the party in full swing!

These two pages are the dabce pages. What you see here is the beginning. They need more decoration. I am waiting on a new stamp with music nots on it do the striking white will all get stamped and will not stand out so much.

What you see here is the beginning.

flip flaps open

So this all took some planning. I got a packet of assorted 12 inch flip flaps. Each of the 6 had to be forward planned with papers, photos and placement of the same into the pockets. All this was done before I stuck flip flaps into place.  I inked, stamped, arranged photos and did the journalling. I put my completed base pages into 12 x 12 memory protectors but left the rest out until the flip flaps were in place.

flip flaps

12 Inch Assortment


To adhere the flip flaps is easy. Simply remove the strip from the adhesive and stick them down. I chose to do this with the base layout flat on the table with the complete pages in the memory protectors. Be careful lining things up. The adhesive is sticky. Carefully adhere the flip flaps to the base memory protector. I did left and right first then top and bottom. Once they were in place I slipped the ready decorated pieces into place. It folds left and right in, bottom up and top down. It doesn’t have to be this way. It depends on how you have planned the decoration for the closed flaps. Mine has a zip strip border.  Not everyone refolds it the way they open it but it works just as well. Note This layout was decorated with the NLA For Always collection.

The next page is titled Oh What a night! On these pages you see me go from freshly made up and excited to decidedly less delicate and all ‘bubbled’ up! I had had a ball but the poise and grace took a beating. I stacked flip flaps on this page. There is a stack of 5 6×4 flip flaps holding 10 photos and one smaller flap holding 2.

6x4 flip flaps

6×4 flip flaps

For these stacks I have adhered the first flap inside the memory protector by making a slit with a craft knife. First piece holes at each end of the slit using a foam mat underneath, then make the cut This will help prevent any tearing of the protector. You can simply stick them on the outside too but I wanted to hide the join.

Here is a video walk through of these pages which is easier than trying to describe them all.

So make sure you have these resources in your stash and tool kit! They are not expensive and really do extend you scrapbook pages. All items are available for ordering now at my online store here.

  • Memory Protector Flip Flaps 12 inch assortment Z1325
  • Memory Protector Flip Flaps 6 x 6 inch Z1726
  • Memory Protector Flip Flaps small assortment Z1747
  • Piercing Tool Kit Z1114
  • ‘Magic’ How to book (covers how to slice protectors and much much more ) 9040

I hope you have enjoyed this post and feel that flip flaps will be an asset for your scrapbooking. See you for letter G!

Your next stop on our Everything ABC’S blog Hop is Michelle Battitori .

In case you get lost along the way…go to Scrappy Therapy

20

Everything ABC’s letter E is for Envelopes

abc bloghopWelcome to the Everything ABC’s Blog Hop!

For this hop we will be featuring the letter E. This may be the name of a paper, a stamp set or an embellishment. Whatever the crafter has chosen as their # element will be featured in their post. If you have just hopped onto my blog, please start at the beginning at Linda’s blog ~ Scrappy Therapy (link: found on signup doc)

If you came from “Pam Trostle Pam’s Crafty Creations

Today I bring you a project which begins with Envelopes and their cards from the CTMH Bulk Colonial White card and envelope pack.

Jubilee envelope mini album

Jubilee envelope mini album

I have used 4 envelopes and cards to make this fun mini album. The idea springs from envelope mini albums posted by Kathy Orta on You Tube, but I have made this slightly differently. I trust you will find these directions adeqaute, but if not by all means head over and watch her video, especially if you have never made a mini album before. This mini album should fit 20 trimmed 6×4 photos – or the equivalent if trimming or using smaller photos. There are a number of pockets you can add more photo and journalling cards to too. I would expect, if you have a go at this, that yours will turn out differently from mine, making each and every mini album and individual work of art because of our choices in paper and embellishment. The best results for a beginner will come from using a coordinated collection.  If you wish to skip right to a video walk through click here.

All of my decoration has been done using the one paper pack, making it easy to ensure everything coordinates nicely. I chose Jubilee simply because it celebrates summer time and because some lucky person will get this as a gift! It would look just as nice with any of the paper packs. Envisage it with Ivy Lane, Ariana, Balloon ride – or use White daisy and try Lollydoodle. Have fun with the decoration using scraps, stamps, complements and assortments. Dig through your stash for pretty laces and florals if using Ivy Lane or Ariana for example. Whatever takes your fancy!

We are going to make this mini book in 2 sections. Each is the same – the second is simply a repeat of the first. If you want a bigger book – add another 2 envelopes and off you go.

Here are the steps.

  • Measure your envelope and your card. Write these down for reference. In this case we have envelopes 4 3/8 inches wide x 5 3/4 tall (sit them vertical at all times) Cards are 5 1/2 x 4 1/4 on each face.
  • Lay two envelopes vertically with flaps up together. Bond the two flaps of envelopes together.
Step 1  join 2 envelopes

Step 1 join 2 envelopes

  • Trim the closed edge on each side a smidge with a craft knife on the metal edge side of your ruler. This will form a pocket your cards will slide into. This is your foundation for everything else.
7-03-2014 10-44-43 PM

The CTMH ruler is perfect for this task.

  • Now we need to make a center pocket. Our card is 4 1/4 wide. We need to add a half inch to each side so cut a  piece of Colonial white card stock at 5 1/4 inches wide. Trim to 10 inches long. Score 1/2 inch in down the length of both sides.  From one end score at 5 3/4 (the height of the envelopes) across the middle. The shorter portion will get folded up , with the short side to the front and form a pocket. You need to make a little dart in the sides where this fold will go – this will help folded flaps sit neatly and reduce bulk.
  • Fold the scored flaps in the side at the small section toward the cente. Flip it over and fold in the long flaps. Use your bone folder for a crisp edge. Turn it back over and secure the front fold(smaller) up onto the long side and secure the fleps. I used double sided tape for this right on the edges.
  • To complete the pocket we need a back. Cut a piece of colonial white card stock 4 3/8 wide x 5 3/4 high. Attach this to the back forming another pocket. Do not be afraid to cut a smidge more off it if needed. Now you should have 2 pockets. (one with no bottom – yet)
  • Attach this pocket section to the envelope flaps. Use secure adhesive such as double sided tape or wet glue such as bonding memories glue. (BMG)
7-03-2014 10-45-05 PM

Now we begin to make the pocket that gets adhered to the envelope flaps

7-03-2014 10-45-30 PM

7-03-2014 10-45-54 PM

Once you have made this pocket attach it to one side of the envelope flaps.

You can now begin decorating all of the page faces.

  • Now we need some of your print pieces cut at a smidge less than 4 3/8 inches  wide x 5 3/4 tall. Just nudge  1/16 to 1/8 of an inch less on your trimmer so they will sit just inside all of the colonial white bases.
  • Cover the left inside envelope taking care not to put any glue where we do not want it in the gap left by the flap. Run tape on the envelope edges top, left, bottom and centre. Use a fine line of bonding memories glue on the inside edge near the middle. Adhere your print paper. Repeat the same for the right side and do all four sides and across the middle of back of the pocket piece.
  • To decorate the pockets we need bits of paper to fit inside – especially the first so tags we put in don’t get caught on the paper when you pull them out. Make sure you cut  piece to fit a bit down into the pocket and cover the flaps. So a smidge less than before – Approx 4 1/8 wide and about 3 inches long for the cover of the top pocket. Measure your bottom piece. I used a scrap that didn’t quite reach the bottom but this isn’t a problem because it gets covered.

I apologise there is no photo of the next step but you will see it in the video.

  • The piece to finish the bottom was cut with the cricut. There are many borders you can use. I used the Cricut Craftroom board. Copied the border. Flippeit, Welded it, stretched it so the whole piece was 3 inches wide. I cit it at 11 inches because I needed two. One for this half and one set aside for the next.You can see this in the video.
  • Score this in the center. Score again left and right of the center by about 1/8th inch. (CTMH ruler grid has 8ths making this easy. Fold at the 1/8 score lines – the little gusset will allow for the widths of the papers here and fit snuggly, Adhere this at the side and bottom on the front to the pocket. Flip it over and adhere to the back. You now have a third pocket to tuck in tags and tickets!
  • Now you need a gusset. This is a 3 inch x 5 3/4 strip. Score at 7/8 and 1 1/8. This is the gusset – allowing room for bulking up your album with tags and photos without straining the spine. CTrim the top and bottom with a slight angle to reduce bulk in the top and bottom. Adhere one side of the gusset to the back of your mini book section being careful to be nice and straight.
7-03-2014 10-46-12 PM

That is it – decorate inside, make tags and then go ahead and make a second one (or a third if you are game – the principles are the same)

  • Congratulations you have finished the first section of your book. Do the sam again with the second one.
  • Join the two books together by adhereing the gusset flap of the second to the back of the first half. You front gusset should still be loose.
  • The cards can now be inserted and decorated as you please. Sometimes I had a theme run over three spaces, other times each panel is diffrent. I also decorated inside cards as well as the flap that shows as a page.
  • Carry on decorating – filling the pockets and making tags. Stamp designs on, add some bling, some string and more.

Once you are ready to put the two (or more) pieces together strong bindings and covers need to be considered. I located great tape, a stiff piece of cardboard (Chipboard in USA language – in Aussie speak this is a timber that requires cutting with a saw!) and a bit of ribbon from my stash.

7-03-2014 10-46-28 PM

Binding

  • Now we need to add a closure. In the original video series  the closure is done with chain. I prefer ribbon so that is what I have used. A good bit of BMG or even modge podge will enable you to wrap a length of ribbon right around from font to back. be sure to leave enough length to tie off.
7-03-2014 10-46-46 PM

Use your stash for the closure

  • The cover is now needed. If you have good strong cardboard you can stick dome of this down and decorate with paper. This is a small book and not to weighty. I decided our cardstock would not be enough. I found stiff cardboard. Once this was on I added a strong tape hinge here. I inked Cranberry cardstock with Colonial white for the back cover and got a bit clever with the front (see below)   You can of course go bigger just like a book cover is bigger than its pages if you have the nice stiff cardboard (or chipboard as it is called in the USA) . I also put red on the front as my carefully selected piece is about to be fussy cut with the dovetail flags and ticket being mounted with foam tape. I needed red underneath. At first I tried it as one piece but the book didn’t open well. Two pieces were better.
7-03-2014 10-47-25 PM

I have covered the tape on the spine with a piece of hemp – CTMH burlap ribbon would look just as good

7-03-2014 10-47-03 PM

  • After adhering the cover cardstock and images it is time to decorate the outside – ribbons, bows, washi tape, lace, buttons and charms are all options you can use.
  • Here is a video flip through of my mini book made with Envelopes. It isnt brilliant but will supplement the above instructions.

I hope the video has filled the gaps and if not, I strongly suggest watching some videos on making envelope mini albums. They look fabulous and make a great gift and I really like the size of our CTMH envelopes!

Leave me a link in a comment so I can come and give you some kudos!

Supply List

You will need

  • 4 cards and envelopes and 2 sheets of colonial white card stock.
  • Your selected paper pack (in this case Jubilee) and embellishments
  • Bonding memories glue (BMG)
  • double sided tape if you have it – it really sticks
  • Trimmer, ruler, bone folder, microtip scissors, a craft knife  and versamat.

Close To My Heart Supply List – All Items are available to order online at my store.  Once you are done shopping it will be shipped right to your door.

Your next stop on our Everything ABC’S blog Hop is ” Anita at Cards and Coffee

Here is the complete lineup in case you get lost along the way 🙂

1. Linda Norman – Scrappy Therapy

2. Joy McHargue –  Studiowow

3. Catherine Nowak ~ Catscrapbooking  

4. Pam Trostle – Pam’s Crafty Creations

5. Jenny Gilbert – Jen’s Creative Classroom  You are here! 

6. Anita Autore- Cards and Coffee 

7. Lauren Moore – CTMH Craftings

8. Michelle Battitori

9. Sharon Chapman-Sharon’s PaperFiesta

10. Cary Magnani – My Heart’s Design

11. Stephanie Feist-The Quilted Scrapper

13. Shalana Glass – Scrappin with Shalana

6

Bright Babushka and Lolly Doodle

1688930_10151786132052574_233543346_n

I have been having a lot of fun colouring and paper piecing the Babushka dolls in Happpy Place stamp of the month. You can have this stamp set for $24 or get if for just $5 with a qualifying $75 order. Have it sent direct to your door with online shopping joining my virtual gathering for march and you also go into the draw to win host rewards for the March online gathering. 

Here is a page layout I created using this stamp set, the Lollydoodle paper pack and some of the awesome metallic bakers twine which is also new. At first glance Lollydoodle didn’t do a lot for me but once I had it in my hands and started playing with it I fell in love with its bright cheery colours. I have used page layouts from our How To Program Make it from your heart Vol 1 page 14

Happy Place Layout. I didn't like the stark edges so I used a stamp set called Stitch wonder to stitch the edges. You can also do this by hand or on your sewing machine.

Happy Place Layout. I didn’t like the stark edges so I used a stamp set called Stitch wonder to stitch the edges. You can also do this by hand or on your sewing machine.

Stamp it up on several different colours and trim out the pieces. For more detailed instructions see my Bog post SOTM Happy Place.

Stamp it up on several different colours and trim out the pieces. For more detailed instructions see my Bog post SOTM Happy Place.

assemble the dolls

assemble the dolls

Mask the bits you do not want in the title with washi tape. Remember to remove it before stamping.

Mask the bits you do not want in the title with washi tape. Remember to remove it before stamping. I masked Happy, then masked the remainder so the finished piece has 2 colours.

Title looks like a hung sign when bakers twine is added. I used a sticky dot to hold the twine in place.

Title looks like a hung sign when bakers twine is added. I used a sticky dot to hold the twine in place.

Background stamping with the LollyDoodle WOTG stamp set adds interest to the stark solid pink.

Background stamping with the LollyDoodle WOTG stamp set adds interest to the stark solid pink.

20140219_221340

I can’t wait to have the photos done to pop onto this page – some photos from around my home.

You can purchase from my online store any time.

Thanks for stopping by the New Product Blog Hop! To view all the other entries and see more Close to My Heart new product inspiration, click here!

Jenny

Continue reading

8

CTMH Stamp of the Month: Happy Place S1403A Australasian Blog Hop

Hello and welcome aboard our Stamp of the month Australasian Close to My Heart Blog Hop. If you have arrived here from Patricia’s Blog then you are in the right place. If you landed here by accident, no problem, please join in by following the link at the end of this post.

I love our March Stamp of the Month. (SOTM) We can get ahead and create some Mother’s day cards, or simply celebrate the unique bond of mothers and daughters with this month’s SOTM Happy Place. I decided to work with a project that would give you plenty of time to complete in time for Mother’s Day in Australia and it all begins with a box and some scraps! March Stamp of the Month Happy Place S1403A available exclusively throughout March for $24 or for just $5 when you spend $75.

Ivy Lane Card gift box

The completed gift box filled with hand made cards ready for your mum or special friend to send on call. What a lovely hand made gift this will make!

The completed gift box filled with hand made cards ready for your mum or special friend to send on call. What a lovely hand made gift this will make!

I am using leftover bits and pieces from my Ivy Lane WOTG kit, Ivy Lane Card making kit, Ivy Lane Complements and Ivy Lane Assortment , and the colour ready Card Box. Of course you will also need the SOTM My Happy Place S1403A

21-20140226_193759

They say in patchwork (and building)  to measure twice and cut once. I need to remember that as it did take me several goes to get the base on the lid and flap of this box. Ideally your piece will run right over the back to the bottom. I had already glued a piece to the back so I couldn’t do that. I will give you the measurements I used but please be aware some fudging is required. The box lid is slightly wider than the base. I had to trim an extra smidge to get a nice fit as I went through the process. There is also absolutely no reason you couldn’t use even smaller pieces of varying sizes of scraps and mix and match to decorate your box. The key design elements here are the top piece of B and T paper, with Babushka Mum and baby dolls and the flower cluster. The rest has been created to coordinate with that vision.

Top of the box art work

Top of the box art work

Ok so looking first at the top, I cut the focus B and T paper – the lovely one with pale ink tones and handwriting – and cut it to 6 x 4 1/4 inches. The Hollyhock piece is 6 1/2 wide and 5 7/8 long. I do try to avoid 1/8 of anything. Here I found that to be slightly too long but not even an eighth and to cut it at 5 3/4 it would have been too short. By flipping the box over onto the lid I was able to fudge the fit trimming a smidge away with a craft knife.

18-20140226_201552

Fudging the fit by trimming a smidge using a craft knife and the versamat.

Now this lid opens and closes – so every fold needs more than just one score line to accommodate it. Once again paying attention to the placement of your measure – having the paper the right way around – score at 1 1/8. This will be the the bit that comes own the front over the magnetic flap on the box.

The CTMH ruler has a steel edge and 1/8 markings making it easy to measure that little 1/8

The CTMH ruler has a steel edge and 1/8 markings making it easy to measure that little 1/8

On the back I placed a piece 6 3/8 x  2  1/4 wide and did a smidge of trimming again.

I did not like having an open edge at the back. It was a bit like missing cornice or skirting boards in your house. I tried washi tape but didn’t like the result with the colours I had so I went for the Gold Shimmer trim. This shimmer trim is currently exclusive to the Ivy Lane Card making kit – and you have heaps of it left after making the cards, so why not use it here right? OK – that fixes the seem and is strong enough in bond to hold well. I fixed all these papers to the box with Bonding Memories glue.

17-20140226_201644Around the front and sides of the bottom of the box I simply looked at the strips I had – the center one was about 1/2 inch too short to go all the way in 2 pieces. I glued these from the back to the front on each side – I had a plan to cover the gap. The bottom has the lovely strips in the Ivy Lane Complements pack. The top is more of that gold Shimmer trim. I picked a flower from the Complements sheet and the bottom was done.

Next I focused on decorating the top. I decided to work with a paper piecing technique. I stamped both the mother and baby dolls on three different colours of scrap B and T Duo and once each on white card stock. I fussy cut the pieces and then played dress ups. I tried several different colour ways and ended up going with the one you see finished here.

stamp the images several times on different papers. Experiment a little.

Stamp the images several times on different papers. Experiment a little.

The Cutting diagram will show you the different ways you can cat these designs. If necessary you can re ink the edge of pieces. There are 5 key parts – the body (which can be the whole) the apron, the head scarf, the tie and the face. On Mum there is also her flower that can be cut separately. For all dolls it is also possible to separate the hair, but I found it easier to colour this part with watercolour pencils. 

Cutting chart.

Cutting diagram.

Fussy Cut

Fussy Cut

Dress rehearsal

Dress rehearsal

When you have all your pieces trimmed out do some dress rehearsal. Experiment a little with colour combinations until you are happy with the result.

Colour up a little with a light shade to take the stark whit away. I used sorbet for the face, Purple for the eyes and Brown for the hair.

Colour up a little with a light shade to take the stark whit away. I used sorbet for the face, Purple for the eyes and Brown for the hair.

Glue them all together Re ink edges if cutting took too much black outline away.

Glue them all together Re ink edges if cutting took too much black outline away.

carefull trim vey small pieces f 3D foam tape for the flower and the scarf ties.

carefully trim very small pieces f 3D foam tape for the flower and the scarf ties.

Once the Babushka dolls are ready it is time to plan the floral cluster. In making my Ivy Lane page layouts I cut extra flowers for the pages. I have made these more dimensional by gently rubbing in the center of them with my bone folder on the back of the versamat. This makes the petals pop upward, just like magic.

gentle circular rub and up those petals will pop

A gentle circular rub and up those petals will pop.

I layered these together to create the paper flowers on the box. It is now time for rehearsal again. Experiment with the placement of the dolls and flowers. I like to back a group of flowers with greenery and the swirl from the Ivy Lane Complements was perfect. Take care removing it from the sheet with all the curly bits. I placed this first, then my dolls, then my paper flowers. I then used the flower assortment that came with Ivy Lane WOTG. Be careful with these – cut the bit of sheet they are on to experiment rather than pull them off the backing. The adhesive is strong. If you put them in a place then change your mind you may be too late. I decided the pale pink ones did not work in this design so I left them out. I finished with the purple glitter gems.

This image is showing you the different heights and dimensions of the finished project

This image is showing you the different heights and dimensions of the finished project

I chose the Like Mother Like daughter sentiment. I stamped black on white and used a dauber loaded with hollyhock to soften it and pink it up and mounted this on a bit of the pink Ivy Lane B and T paper. I have already made my Ivy Lane cards so I popped them in the box and voila, the gift is finished.

Here you can ee how i covered the gap at the front of the box way back when I started this project.

Here you can ee how i covered the gap at the front of the box way back when I started this project.

Ok – Sorry this was such a long post but I hope you can get though the instructions! Here is another look at the finished box to save you scrolling back to the top

The completed gift box filled with hand made cards ready for your mum or special friend to send on call. What a lovely hand made gift this will make!

The completed gift box filled with hand made cards ready for your mum or special friend to send on call. What a lovely hand made gift this will make!

Want more Piecing? How about this example using Skylark

Pieced card using Skylark scraps

Pieced card using Skylark scraps

SOTM Happy Place is only available until 31st March from your CTMH consultant. I’d love you to leave a comment before heading off to the next stop, Mandy’s Hall of Indulgence . Happy Hopping!

Shopping List

WOTG Ivy Lane G1073

Ivy Lane Card making Kit G1079 This is where you will find GOLD shimmer trim!

Ivy Lane Complements  x7178C

Ivy Lane Assortment Z3001

Purple Glitter Gems Z1936

Stamp of the Month – Happy Place

My Creations Card Box Z1647

Watercolour Pencils 3505

Exclusive Inks – Black z2105

Bonding Memories Glue 1512

3D Foam Tape Z1151

Art Philosphy Cricut Collection (Use to make the flowers) Z1686 

Tools – Versamat z1279 Bone Folder Z1204 Ruler Z1471