10

Everything ABC’s Letter V is for Volcanic

abc bloghop

Welcome to the Everything ABC’s Blog Hop! For this hop we will be featuring the letter V This may be the name of a paper, a stamp set or an embellishment. Whatever the crafter has chosen as their V element will be featured in their post. If you have just hopped onto my blog, please start at the beginning at Linda’s blog ~ Scrappy Therapy. If you came from “Lauren Moore – CTMH Craftings”  then you’re on the right track!
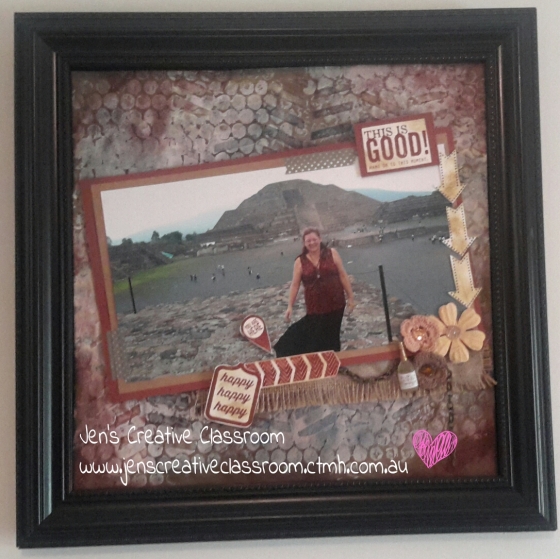

Hello and welcome to a small piece of my personal Scrapbooking world. I am a lover of mixed media and like to dabble in it from time to time. Choosing a V project isn’t easy but I have settled on this page that illustrates the fabulous Sun Pyramid, the largest structure in the Ancient City of Teotihuacan in Mexico. It is my V project because of the presence of coarse red volcanic rock which I have attempted to symbolise in the background art work on this page.
I first visited Mexico in 1979 as a child. I was an exchange student and at the mercy of host families to see the country. The day I was brought to visit these pyramids we found them closed. (I suspect that family knew little about them!) I dreamed of a return to Mexico, and promised myself that if I ever did I would go to the Sun and Moon Pyramid. Fast forward 35 years here I am on the Street of the Dead with the Sun Pyramid in the background! Volcanic rock heaven!!! I could not walk the street due to sciatica but I was there….right there…at last!
volcano texture

The Sun Pyramid of Teotihuacan. This page is presented in the Black Designed Decor Black Shadow Box frame It just makes the page even more stunning. I love how I can quickly pop pages in and out of these frames!

The pyramid rises 216 feet (66 metres) above ground level, and it measures approximately 720 by 760 feet (220 by 230 metres) at its base. It was constructed of about 1,000,000 cubic yards (765,000 cubic metres) of material, including hewed tezontle, a red, coarse volcanic rock of the region. (Read More about this fascinating landmark here).  Obsidian, a Volcanic Glass is also present in the ruins.

I have created this page in the following way:

  • Base 12 x 12 Slate cardstock
  • Overlay with Texture paste. I used the V shape of the overlay in the Sugar and Spice Key of artbooking page 80 and a knife to lay down this shape to reflect the steps of the pyramid. Allow this to dry well.
  • I used bubble wrap technique to add some spots for the round rocks evident in the stone work. I simply painted the wrap with gesso and pressed it onto the paper in places around the dried texture paste. Focus on ares that will not be hidden by the photo.
  • Smudge it all up! I used ink pads direct on the texture paste and in places of the spots. I used the sponge to add more and rub edges. I have not completely eliminated the slate grey background. I have used Slate, Cocoa, Chocolate and Barn Red inks to achieve the overall look. If you do this it will look different – it is the process rather than the outcome that is repeatable!
  • The next step is to rehearse the placement of the photos and mixed media embellishment pieces. These flowers and the champagne bottle button were from my stash. The Jute Ribbon is a product NLA from CTMH. The chain is a piece of a Base and Bling Faux Gold chain. Chain looks great on pages! Just snip a bit off with pliers!. These items are all quite deliberately grouped in the bottom right corner and help to tell the story. The hessian has the harsh texture of cloth from the time, the chiffon symbolises the wealth of the priveleged who lived here, the flowers represent Roses, a national symbol of Mexico, the bottle of bubbles my celebration for finally being there and the chain marks the sections of the city protected and still to be excavated.
  • If the eye is lost it can follow the stamped signs which are from different stamp sets. Here we Go D1600 and D1622 Wanderful WOTG set as well as A1160 All the details NLA (Host reward) Stamped embellishments are in Barn Red on Colobial White, smudged with Desert sand to age them out.
  • I adhered the photos to Kraft and Barn Red cardstock as a mount and used foam tape to stick it to the base. There is also a bit of Slate Washi Tape tucked in there.
  • Liquid glass is my best friend for sticking everything else down.

I am so pleased the Pyramids are all now under the good care of Authorities and are being properly investigated by archaeologists and historians. I am truly grateful to have had the opportunity to be gobsmacked, up close and personal with the pyramids and bringing a dream to reality!

What is really fun about mixed media is no page is ever the same. Sometimes you can start with a sketch, sometimes the photo, as was the case here. As long as you can tie it all together with a colour, a theme, and can clustering of embellishments it will work for you.

Here is a list of Current products used in this project. You can shop online at Jen’s Creative Classroom and have it delivered right to your door.


I love getting your comments and feedback. Be sure to leave a comment below before you move on in the hop! Thanks for stropping by

jenny sig

Your next stop on our Everything ABC’S blog Hop is Carol-Anne Grenier. In case you get lost along the way…go to Scrappy Therapy for a complete list of participants!

12

Everything ABC’s Blog Hop D is for DREAMER

abc bloghopWelcome to the Everything ABC’s Blog Hop!

For this hop we will be featuring the letter D. This may be the name of a paper, a stamp set or an embellishment. Whatever the crafter has chosen as their # element will be featured in their post.

If you have just hopped onto my blog, please start at the beginning at Linda’s blog ~ Scrappy Therapy

If you came from “Catherine Nowak ~ Catscrapbooking” then you’re on the right track!

CTMH have some awesome products that support projects related to encouraging those we clove and ourselves to embrace our dreams. We have a gorgeous new Dreamer Stamp set ( B1439) and our fabulous Dreamer style (Z1976) sheet that goes with the Base and Bling range (P 80-81 of the Feb-July 2014 Ideas book) So Imagine if we draw those two products together to create the perfect gift for a teenager with a lovely necklace to encourage dreaming and a card to go with it. This is what I have for you.

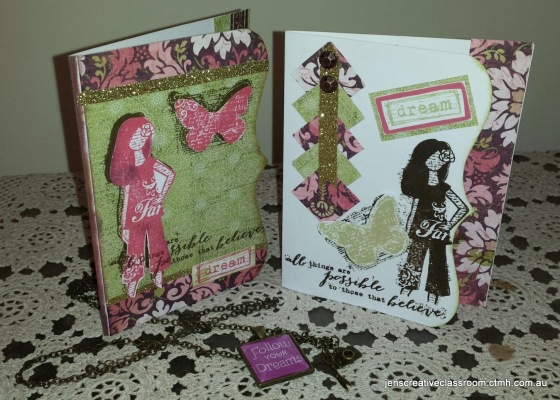
Dreamer Stamp set and Follow your Dreams Base and Bling - an awesome gift making combination.

Dreamer Stamp set and Follow your Dreams Base and Bling – an awesome gift making combination.

The Cards

Both cards are made on White Daisy die cut cards Z1473. I LOVE the quality of CTMH blank card bases!  To complete both of these cards i have used leftover papers from the Ivy Lane Card making kit. I have used the strips and scraps in a number of ways.

B1439

Card One

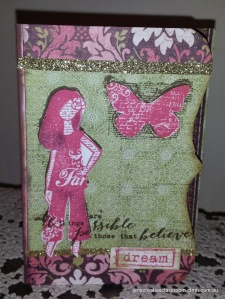
Card one- Pink Dream Diva

Card one- Pink Dream Diva

For card on I stamped the Dream Diva girl and the butterfly with Hollyhock ink and fussy cut the actual figure out. I added a light smudge of Desert sand and even a spot of black to some edges. I was a bit short on the left so I have daubed this in the colours I had out. I stamped in the Ivy Lane Green print background in with the dream Diva and the butterfly in Black ink. This allowed the sketchy shadow lines of the stamp to still be there underneath the fussy cut piece. The pink Diva and butterfly were then monted right on top of this background images. I used the Microtip scissors for all the cutting including following the bracket contour of the die cat front of the card, The gold shimmer trim adds the nice touch of bling. At the time of writing the ONLY place you can get this colour shimmer trim is through purchasing the Ivy Lane card making kit. Dream is stamped in Hollyhock and smudged with a little desert sand with a dauber. The curved edge of the card is finished off with a dauber and Desert Sand.

Card Two

Here I have focused on a plain background with Ivy Lane accents.

Here I have focused on a plain background with Ivy Lane accents.

The elbow of the Diva fits nicely into the point of the diecut. The sentiment fits just snuggly underneath. Careful placement of the images is what you need here. I did the butterfly by inking in hollyhock, stamping once, reinking in sweet leaf – this gave me a more muted soft green colour which matches the Ivy Lane Green. You could do this by kissing too. Ink up the butterfly and another stamp such as a solid heart or lacy stamp inked in Sweet leaf. Stamp off some of the hollyhock first so it isn’t too strong. Kiss the butterfly with your second stamped inked in sweet leaf. It should look different to mine – and will almost always be slightly different each time you do it depending on the amount of ink and the way you kiss the stamps together.

I simply cut some scraps to make some squares and held them together with gold shimmer trim. The dots here are from the mini medley accents rosewood collection Z1857 Dream is stamped in swet leaf and mounted on hollyhock and the Ivy Lane green print. The curved edge is highlighted with a dauber laded in sweet leaf.

Dreamer Base and Bling

Base and Bling is a totally new product range for Australia and it truly is the fastest, easiest way to make nice dress jewelry for anyone including yourself. Pictured here is what I have made for myself.

7-20140218_141246

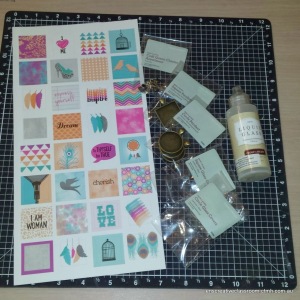
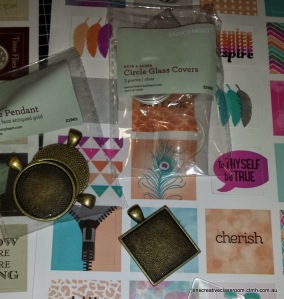
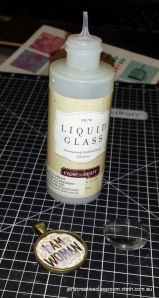
All you need is a chain, a square pendant, a matching glass,  one of the sticker style sheets, some Liquid Gloss and a baby wipe! If you like the charms you can add them too. Since I am crafty I have added the Craft Queen charms (z1958) to my necklace.

1-20140202_174001

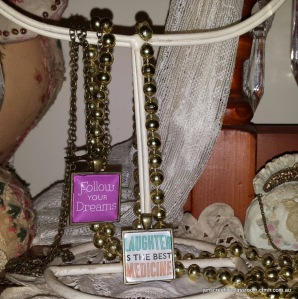
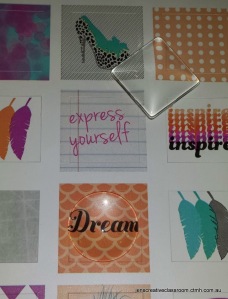
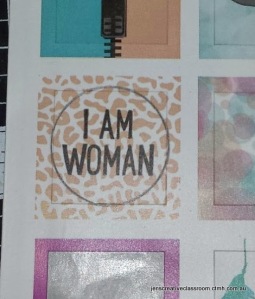
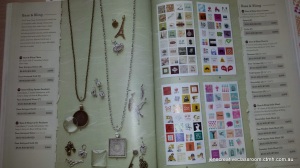
Pictured here is the Dreamer style sheet (Z7976) As you can see there are a LOT of designs to choose from and it would be very easy to make a few to add to my change depending on my mood and the message I wish to give myself for the day. Follow your dreams is the first one I made. I then made laughter is the best medicine. In the image below you can see how I can add them to a hanger and display them as part of my decoration on my dresser too!

2-20140202_173750

OK…so is it easy? You bet. Square ones are a cinch.

Make  a Dream necklace to go with your card

Make a Dream necklace to go with your card

2-20140218_211438

1. Peel sticker from the style sheet and place it into the square frame. Pres down firmly in the corners – use a stylus or similar for the corners. Put just 5 dots of liquid glass on the sticker – aim for near the 4 corners and the center. Grab your glass – try not to touch the back so a fingerprint does not become a problem and drop it into the square base. press firmly down. As you do this some liquid glass may escape – wipe this away immediately with a baby wipe. Your dots of liquid glass should have been big enough to spread and join with each other for an even coverage between the glass and the sticker.

Here is a way to test and try to see what you like and I have photographed how I made a round one for you step by step. If you have a desire for a round one you can trace and cut a circle as I have below, or you can use a 1 inch circle punch to get a nice circle. My hand cut circle is not all that ‘perfect’ but once the glass is in with its magnifying qualities the outside edge of the circle doesn’t matter.

7-20140218_211452

Test out the glass over a design

Test out the glass over a design

Use the round glass to trace a circle

Use the round glass to trace a circle

Ready to stick

Ready to stick

6-20140218_212254

Notice the 5 dobs of liquid glass

You can see the foru different desins and all the elements. The faux antiqued gold and silver in colour chain, the charms. and the styles sheets all on pages 90-91 of your Ideas book.

You can see the four different designs and all the elements. The faux antiqued gold and silver in colour chain, the charms. and the styles sheets are all on pages 90-91 of your Ideas book. If you do not have an Idea book you can check it online, or contact me to order one by post.

That’s it!   Thread it on your chain, add charms and wear it!! This is a very cost effective gift for anyone and takes very little of your time.

CTMH has given us a great video now too

1-20140218_231349

You can purchase all of the products used in these projects to make a sweet gift for someone who needs a special birthday gift, or some words of encouragement and support.

Shopping List

Cards

Base and Bling Gift

Thank you for stopping by. I sure hope I have inspired a gift to your special friends and family with these ideas.

Thank you for stopping by

2012_0824(023)

Jen

Your next stop on our Everything ABC’S blog Hop is Lisa Plummer – Flaunt Your Creativity

Here is the complete lineup in case you get lost along the way 🙂

**Find the lineup on the signup document**

1. Linda Norman- Scrappy Therapy 

2. Lauren Moore- CTMH Craftings

3. Michelle Battitori

4. Catherine Nowak ~ Catscrapbooking

5. Jenny Gilbert – Jen’s Creative Classroom

6.  Lisa Plummer – Flaunt Your Creativity

7. Cary Magnani – My Heart’s Design

8. Shalana Glass – Scrappin with Shalana

9. Pam Trostle – Pam’s Crafty Creations

10. Michele Pryor – Michele’s Ink It Stamp It 

11. Sharon Chapman – PaperFiesta

12 Anita Autore Cards and Coffee