6

Happy Times National Stamping Month Blog Hop

Hello and welcome aboard our National Scrapbook Month Australasian Close to My Heart Blog Hop.  If you have arrived here from Wendy Hopper  then you are in the right place. 
If you landed here by accident, no problem, please join in by following the link at the end of this post. 

Today I would like to share with you a creation which features Close To My Heart’s National Scrapbook Month Paper Collection Happy Times

NSM Happy Times

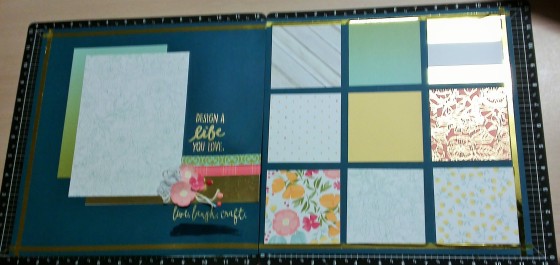
This paper is just so pretty it is hard to decide which way to use it and which bit to use so I have used it all! I decided to make a layout to share with my CTMH Team celebrating our crafty lives. I have no photos on it yet (I know not good) but now I have an excuse to take some snaps and a page is ready to go for our Convention Photos. I have used a couple of consultant only stamps as my Happy Times stamp has not yet arrived. I also used the paint brush stamp from the set we had ealrier in the year for National Stamping month. It is a  favourite!

National Scrapbook Month Free paper collection with orders http://thecreativeheart.ctmh.com.au/

National Scrapbook Month Free paper collection with orders over $85


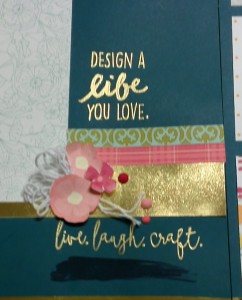
Embellishment detail

Embellishment detail

To construct the layout I cut a 3 1/2 inch strip from each paper and created 3 1/2 inch squares. I arranged these how I liked as evenly as I could on the Peacock background. This will be the background for a smattering of 3×3 photos. On the other side I used a 7 inch strip of the green/blue paper and made a 7 1/2 x 5/12 base ready for a 7 x 5 photo. I took a solid piece of the gold foil and some zip strip pieces to ground the photo and fussy cut some flowers from the floral print. (My stamp set has not arrived yet!)  I have tucked in some loops from the new White Twine and used Gold Heat embossing for the sentiment. I finished it off with pink enamel gems. I decided it needed a border so I have used Gold foil tape. This design could also easily be replicated with Pomegranate as the background colour.

PS Sorry about the shine on the gold foil paper!

This exclusive National Scrapbook Month Paper Collection Happy Times is only available during MAY. 

  • It can be yours for FREE with a qualifying order of $85 or for $23 if ordered separately from your CTMH consultant.
  • The coordinating Stamp set is also avaliable for $27
  • Don’t forget your Stamp of the month and your free new Seasonal Expressions book with your order!


If you do not have a consultant please contact me or place an order here.

I’d love you to leave a comment before heading off to the next stop,  Meryl Cheetham – Mez’s Craft Room


Products used

  • Peacock Cardstock and ink
  • Happy Times Paper Collection
  • Ez Dot adhesive
  • Go;d embossing powder
  • Versamark ink
  • 3D foam tape.


28

Zoe Collection Australasian Blog Hop

Zoe

Hello and welcome to our mid month blog hop featuring the lovely new Zoe paper collection. If you came from  Lauren Moore – CTMH Craftings-  you are in the right place. As the hop goes full circle you can follow along to the next link at the bottom of this post.


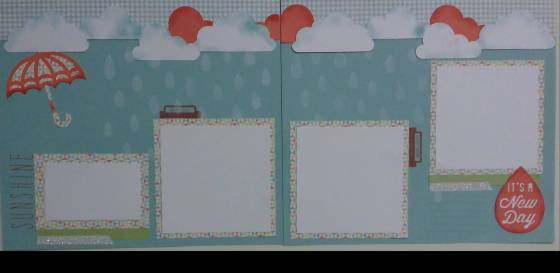
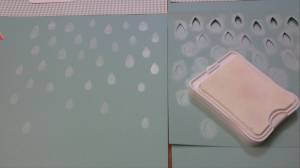
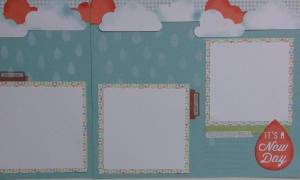
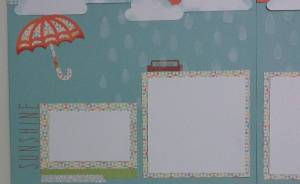
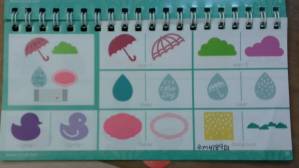
Today I am bringing you a delightful double page layout featuring the Zoe Paper collection and some cuts made with the new Cricut Artistry Cartridge. I love the new icons and with over 700 images it is good value for money. I used umbrella key on page 38 to make the clouds, the umbrella, the new day and to cut the stencil for the raindrops. I cut the rain drop stencil at 6 inches and inked the drops with white pigment ink.

http://jenscreativeclassroom.ctmh.com/Default.aspx

Zoe papers and raindrops from Artistry

For the rest of the pieces I distressed the edges with sponge daubers using tone on tone and Glacier on white. I also added a little extra decoration with the Zip strip and some stamps from the Zoe WOTG stamp set which I adore. It is a very versatile set for scrapbooking and even includes a set of lines for journalling. Finally I have still got Coral sequins so a little White Shimmer trim and sequins have finished off the page. All I need now is a rainy day to get some photos! (it does not rain here much!)

zoe

Use a dauber and the rain drop overlay to get the rain drops.

zoe6 zoe5

zoe3 zoe

All of the products are available from my online store. We have a fabulous Stamp of the Month and the Get organised campaign as well. The Zoe Collection is the first of the new papers we have coming your way September 1 in our new Idea Book! Get excited, there is more exciting stuff to come!

I love getting feedback, so please leave a comment before you move on to the next stop on the hop with Meryl Cheetham – Mez’s Craft Room Hop along and see what lovely artwork she has to share with you.


Close to My Heart Products used in this project include:

http://thecreativeheart.ctmh.com.au

Artistry Cricut Collection

http://thecreativeheart.ctmh.com.au

Zoe Workshop on the Go

White Daisy Pigment Ink

Dauber Value Pack

http://thecreativeheart.ctmh.com.au

Coral Reef Sequins

Happy Birthday CTMH Australia!!

Happy Birthday to The Creative Heart, The Creative Heart Team, to Close To My Heart Australaia  and all my  #ctmhaustralasia sisters!

It has been two years since I started with the awesome company Close To My Heart and I could not be happier! I am grateful Jeanette created this company with its central messages and that Brian went looking for a good company to take us into in 2013.

Would you believe two years ago I could not stamp to save myself? I even had to give myself permission to use stamping in my scrapbooking! Since then I have learned the joys of the Cricut, made flowers, and made use of my knowledge of painting and other mediums to make some pretty creative mixed media pieces and taught classes, workshops and more. I have been on trips away and found the rewards are much more than where the money is.

Most important to me is the new family I have.  I have met some awesome #ctmhsisters and had heaps of fun at conventions, retreats, crop events, my classes and launch events. Sisters are always there with help and support any time of day and my amazing Presidential Director visits our little country town during the year too! I have the Mantra ‘Everyone is welcome here’. I have grown a team of ‘sisters’ who watch out for each other and share and care for each other. I have done my best to be a good leader and while not being able to meet everyone’s needs I have done as good as I could at the time.  I could not be prouder of my team and how they have grown with me.  Just yesterday I had one very excited team member who made her first quarter work for her. I was like a proud mum. It warmed my heart to hear her excitement!

I could gush for ages about how awesome this company feels – but will let these photos do that work. Here are some snaps of where the Creative Heart Team has come over the last two years. If you would like to be part of the fun we have be sure to drop me a line. You can of course join any time right here.


I was just a bit excited about getting my box!

I was just a bit excited about getting my box!

1074037_10151768195884808_1054187615_o 740675_10151772010454808_708267901_o

Myself and my first two team members - we get together regularly to crop and share ideas.

Myself and my first two team members – we get together regularly to crop and share ideas.

P1020015

My goal was to fill this workshop space.


To infinity and beyond

To infinity and beyond

If you want o know more please contact me. if you want to see more head to the video post about sticky boy!

If you want o know more please contact me. if you want to see more head to the video post about sticky boy!

Proud to wear the manager ribbon - it is real :)

Proud to wear the manager ribbon – it is real 🙂

Sarah Shipton our Senior Director, Sandra Boutlon and Amy Langford, members of my team and myself.

Sarah Shipton our Senior Director, Sandra Boutlon and Amy Langford, members of my team and myself.

Monica is an awesome powerhouse of a woman, a pocket rocket. She is an awesome working mum and advocate for the company. It was a pleasure to be in her company.

Monica is an amazing woman, a pocket rocket. She is an awesome working mum and advocate for the company. It was a pleasure to be in her company.

Be You

Be You

This is the finished page.

A mixed media page

Launch event 2014

Yay- we are reaching that goal!


classroom classes

In my home classes


Pink decoration, Pink Food, projects using pink and a goodie bag with the Pink Ribbon Motiff are all a feature of this event!

Pink decoration, Pink Food, projects using pink and a goodie bag with the Pink Ribbon Motiff are all a feature of this event!

IMG_0407

OMG!!! We are full!

IMG_0344

Leaders Conference

IMG_0404

I LOVE teaching people to craft. Did you know that? lol

The Aussie Contingent

The Aussie Contingent in Disneyland 2014

Convention

Disney 2014

convention

Disney 2014

convention

Disney 2014

convention

convention

convention

convention

convention

convention

Disneyland CA 2014

Disneyland CA 2014


23

Summer Crush Campaign

Welcome to the Summer Crush Blog Hop

SummerCrushBadge

During the month of June, when you purchase any My Crush™ book and its accompanying assortment pictured in Annual Inspirations 2014–2015, you will receive the coordinating stamp set FREE! That is a savings of at least $15 AUD. Every My Crush book features a hard cover with wire binding and cardstock-weight pages that are printed with eye-catching designs to form the perfect bases for your memory keeping. There are coordinating assortments featuring sticker sheets, envelopes, alphabets, cards, and journaling spots, which along with your free stamp set, will help you to be well on your way to your own gorgeous mini book creation! This offer is only available while supplies last and once they’re gone, these books are gone for good, so put your orders in early! Contact your Close to My Heart Consultant today.  PS These books make awesome Christmas gifts!

 If you have arrived her from Krista Hershberger you are in the right place. Like always, our hops go in a circle. So just keep hopping until you get back where you started.  If you do get lost along the way a complete list of hoppers is available at Melinda’s Blog Here. In this hop I hope you get to see lots of artwork ideas and consider these awesome little books as potential surfaces for treasured keepsakes, or just more awesome paper to use in a way you choose. I think they make the best Jounals and have always been good stocking fillers.

 Purchase your choice of Crush Book and coordinating assortment and you will get your stamp set for free! Click for more details.  They are perfect for adults like me but tweens love them too!

I gathered my stuff together - Blue Bird Book, Bluebird assortment, Glacier twine, Aqua Dots, Shin Han Markers, Blocks, ink,

I gathered my stuff together – Blue Bird Book, Bluebird assortment, Glacier twine, Aqua Dots, Shin Han Markers, Blocks, ink,

There are 5 books to choose from altogether – Modville, Bluebird, In the Pink, Wildwood and Holiday Happenings. For this post I am sharing a page I created in the My Crush® Bluebird/Memories Combo.There are actually 2 combos for this book to choose from because there are 2 assortment packs!

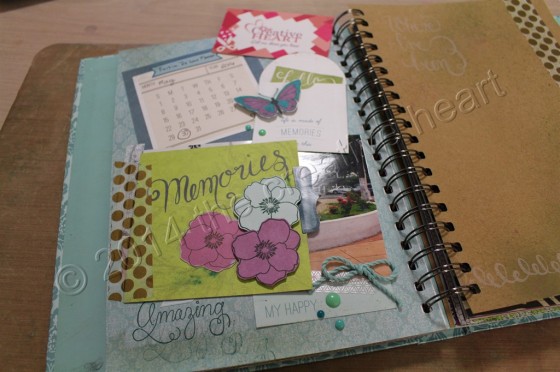
To begin with I have no real plan – just a whole lot of coordinating product. I have the book, a photo, and the stamp. I have the assortment, some washi tapes, aqua dots, Shin Han Markers and Ponderosa Pine ink. I begin by deciding on possible embellishments from the assortment. Here are the steps I followed:

  • I do a little dress rehearsal with different elements to see what I like.
  • I stamp some of the flowers on the coloured card in that assortment and fussy cut them. I stamped others and the butterfly and coloured them.
  • Looking at the stickers I use a deep teel green and a fuschia coloured tab sticker back to back to create a tab and have the Gold Dot Washi and Silver washi ready as hinges to make a flap for journalling.(I am feeling pretty sentimental so lots of journal space is needed on this page. I may even write a whole lot more on the page next to this one. )
  • I begin laying down and layering the elements and decide to stamp on the page. Since I have already got some things in this book it is necessary to put my versamat under the page and right up against the coil binding so as to get a flat even surface to stamp.
  • I made the journaling pieces and did the journalling before sticking them down.
  • I did decide after I had put some things down to add a little spray mist with reinkers and that was not as successful as I hoped.
20150605_175528

Using the versamat under the page for a stable stamping surface.

Crushbooks are fun projects for odds and sods in your photos abd memorabilia. They will reveal the quirks of you and your life providing your family an insight into you.  I have filled one Crush book almost completely, made a good start on a second and made a start on a third. I treat them very much as reflective journals and try to use them to offer my children and theirs an insight into my everyday life.

Here is the completed pagefrom today’s effort. (I must fix the watermark date!)

Jenny Gilbert thcreativeheart.ctmh.com.au

Finished Page


Jenny Gilbert thcreativeheart.ctmh.com.au

Inside journalling

Jenny Gilbert thcreativeheart.ctmh.com.au

journal flap hinged with washi tape

Jenny Gilbert thcreativeheart.ctmh.com.au

Butterfly detail

 If I still have your attention please join me on a walk through my completed Modville Crishbook book. I am still not an expert in video making but this time I did use a tripod!

 Your next stop on the hop is the fabulous artwork by Nikka Geers Thank you for stopping by. Please leave a comment before you move on. (ps I have done what I can to try and stop the need for you to login in or sign up to comment so let’s see how that goes.) 

Gallery
11

May SOTM Just Sayin S1505 (International)

Yay -I am so very excited to be back in the blog seat! I am even more excited to be blogging in such great company along with 67 other consultants from all over the world!  I am a scrapbooker more than a card maker so I am super excited about the May Just Sayin S1505 set and know it will go well with all our planned National Scrapbook Month pages too. If you have arrived here from Michelle Battitori’s blog you are in the right place. For a full list of participants you can head to Melinda’s Blog.

MaySOTMBadge

I am sharing with you today my interpretation of the page presented in the Annual Inspirations that features this stamp set. I have added the left hand side page to it. Go ahead, take a look at page 21 for yourself.

1505-sotm-layoutYou can see there is a little bit of Snowhaven paper pack at the bottom. I had just enough left for 2 pages. The rest of this double page layout has come from my scrap box including photo mounts from National Paper Craft Month Year Noted Kit (that was special!). The colours were just right for wha I wanted to do in replicating the page from the magazine.

S1505 Just Sayin

I went ahead and did a lot of stamping on scrap bits of White Daisy Cardstock and then arranged all the bits around the photo mounts and B and T trim.

Just Sayin Stamp of the Month

Just Sayin Stamp of the Month

I have used a variation of Thistle, Canary, Glacier, Sorbet and Black in stamping the elements from the stamp sheet. I have repeated the triangles for the banner in the top right and used the circles under the daisies. I used Glacier Thick Twine to support the banners and have mixed up mounting some pieces flat and some on foam tape for additional dimension.

20150429_165615

Cluster the triangles for a banner, use the square shapes for titles and journalling


20150429_165624

This is similar to the cluster in the Annual Inspirations Book, using a number of the titles from the set.

The collection of titles are varied by colour. I have used my most favourite of our bling, gold gems, for the centers of the daisies. My daisies have come from excess flower cuts on the cricut. I knew if I used the ‘fill page’ function I would eventually have a use for all those daisies! These have been inked eith in the center or at the outer edges with Crystal blue. I used Silver Shimmer trim on the edges of both pages rather than mount the white bases onto sparkling card stock.

20150429_165610

Cluster it thin banner flags and be sure to support the flowers with a bit of colour. I have used the circle stamp to do this.


I hope you have been inspired to replicate what is in annual inspirations and can follow my layout for your partner page.  Ask your consultant about the Recipe! For a complete list of products used see the list below.

Thanks for stopping by. Please leave a comment before you move on! I love to have your feedback.

You now may have completed the loop of hopes if you started with Melinda Everitt. If not hop on over to her page and keep going through this lovely range of artwork. Click right here on Melinda Everitt

Products used to create this page are available online from my Website to Australian Customers.


Thanks for stopping by. Please leave a comment before you move on! I love to have your feedback.


13

Everything ABC’s Letter B – Birthday!

abc bloghopWelcome to the Everything ABC’s Blog Hop!

For this hop we will be featuring the letter B. This may be the name of a paper, a stamp set or an embellishment. Whatever the crafter has chosen as their # element will be featured in their post. If you have just hopped onto my blog, please start at the beginning at Linda’s blog ~ Scrappy Therapy If you came from Stephanie Feist-then you’re on the right track!


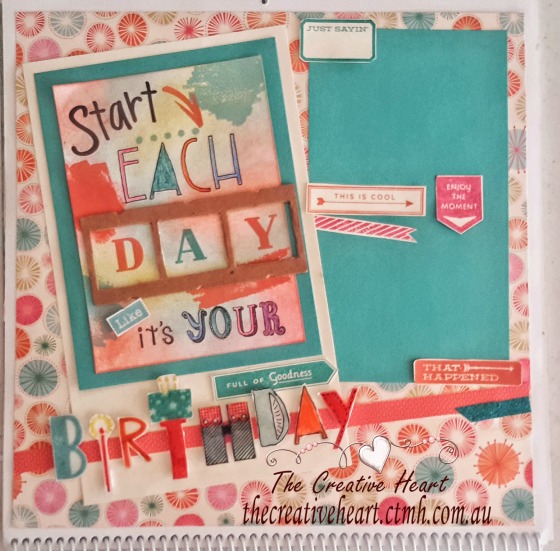
 Your Birthday is supposed to be fun right? Mine is in MAY, and this is my May Calendar page!


Bis for Birthday

B is for Birthday

If you have been following the blog you will know I have been working on a Calendar project. I am up to June – but wish to share with you up close and personal my May Page, since on good advice (as above)  I plan to celebrate my birthday all month long! Right now I am into colour – and lots of it (usually I am an earthy neutrals girl unless it is red and purple…that is different!) ; and I am into finding those mantra’s and sayings that will lift me up in 2015. This is a gem!

My bestie Sandra shared this pinspiration – ‘Start each day like it is your Birthday’ with me but I have had a bit of a time locating it so pinned it myself.  The timing of her sharing this with me was impeccable. I loved the design and it’s colours. I so totally had to scraplift this one for my May page. My finidshed art work is not the same but is deeply inspired by that  pin..  I cannot give you more than the original artists website – Sketcherella – the orginal image is gone – but the pinned image remains. (go figure….)

SO…Hopscotch was the obvious paper palette choice. I had a bit of white card stock as my base about 5 x 7.  It turned out not big enough to carry birthday so I did it completely separate and trimmed it back a bit from there when done.I have used quite a number of the Close To My Heart Alphabet sets listed below, as well as the awesome new Brushstrokes stamp set C1608 (love this one completely!)  If I had it I would also have incorporated Framework Alphabet E1027. The H in Birthday is from a little M stamp that is NLA (M1030). I just stamped it without the bow and cut it up the middle. The current retiring ‘HI’ stamp would work too. I deliberately mixed up colours and stamp sets here – you do need to play and do your thing with this! My T in birthday (thanks again to inspiration from Sandra) is topped with a gift and candles all from the Build a Cake Stamp Set D1618  There is a bit of Circus Alphabet and Washi Wonder in there – all limited edition stamps from our previous catalog. (Just goes to show Host Rewards and Stamps of the Month really are spesh! Ask your onsultant – I promise they will be thrilled to tell you all about it!) ) Once all the lettering was done on the main piece I smudged colours into the background with my sponge and stamped the brushstrokes shapes into places they fit using different colours from the hopscotch palette.

Letters that needed colouring were coloured with watercolour pencils. Those which were also being fussy cut were given a lift by first spreading liquid glass onto them and allowing them to dry.  TIP – Do all the letters you intend to liquid glass on on one piece of card stock- liquid glass them all. Fussy cut when dry. I tried the other way and it is messy, requires tweezers and….yep not a good result. My repeat effort with one sheet, letting them all dry then cutting them was much better. You CAN cut dry liquid glass….it is not rock hard 🙂 It’s nice n flexible on paper.

I mounted the completed saying piece onto lagoon and this went on the Hopscotch background. I used a scrap of the reverse of Hopscotch as a strip to support the word birthday and added a flash of bling with Teal Shimmer trim Z1918. A 4.5 inch wide strip of Lagoon is there ready for Birthday photos and the added labels are a sneak peek of a Stamp of the Month that is coming for you in May.

I think that covers it. I used my stash, I used alphasets, I used lots of colour, and now in May I will be encouraged to celebreate each day as if it is my Birthday – on one of those days it will be!

Close To My Heart Products Used in this project

Please leave a comment before you move on. Your next stop on our Everything ABC’S blog Hop is “Lauren Moore – CTMH Craftings “.In case you get lost along the way…go to Scrappy Therapy 

Thanks for stopping by

Jen

jenny sig

5

November Stamp of the Month Blog Hop S1411 It’s The Little Things

sotm blog hop


It’s The Little Things

Hello and welcome aboard our Stamp of the month Australasian Close to My Heart Blog Hop. If you have arrived here from Lauren Moore – CTMH Craftings  then you are in the right place. If you landed here by accident, no problem, please join in by following the link at the end of this post. 

I Love SPRING, and flowers! Don’t you? I can see these lovely flowers adorning gifts of all sorts as well as Spring Racing Carnival Pages if you are lucky enough to be heading off to a Melbourne Cup celebration. Here is a nice relaxing project I have made with this stamp of the Month. I hope you enjoy it.

PicsArt_1414727107737

Two little gifts which feature November Stamp of the Month S1411 It’s The Little Things available exclusively throughout November for $27 or for just $5 when you spend $75. One is a Slate Designer Creations Bag Z2053, the other is the Slate Designer Crreations Paper Bag Z2036

We all have a scrap bin right? With LITTLE THINGS …little bits of paper in it! This stamp set is perfect for using up some of those scraps! You can stamp tone on tone, stamp colour on white, Rock n Roll, do overstamping, grab your spray pens Z1380 and reinkers and try a little over spraying, or even get out your Watercolour pencils 3505!

Let the little girl who loved to colour in come out to play here!

PicsArt_1414727691748

In this shot I show you some of the stages I went through to create my two projects. I started by simply stamping up pieces and colouring some. I then fussy cut them out so I ended up with a pile of cut flowers and foliage.

I did do a lot of spraying on my leaves to get texture. I sprayed in green with a little of that pearl paint we no longer have (but want back) and some darker olive green – or was that black? (Our black reinker has a green base so I often use that) I hope you can see this helped add some texture to the foliage pieces.

PicsArt_1414727243558

If you follow my blog, or come to my classes you will know about the dress rehearsal step. I played with those flowers and nothing seemed to work for me until I supported them with simple white cardstock. Then like magic the two gift wrappings came together.

PicsArt_1414726859178


Here is what I did.

  • I used card measuring 3 x 3 1/4.
  • I stamped the sentiment Just for you top on one and bottom on the other just so you can see you can very this too.
  • I have a band of Silver Shimmer Trim supporting this.
  • Next layer the flowers out until the arrangement is appealing.
  • Take a photo of it! . (I love that we can do this in the modern world!)
  • Slide all the pieces off and start adhering them using the photo as a guide. You won’t have to remember where they went! Some are adhered flat with EZ dots adhesive. Some are mounted with 3D Foam Tape.
  • Bling it up – pop in some Thistle striped ribbon, coloured Bitty sparkles (Use our Shin Han Twin Touch markers) and some other bling gems.

PicsArt_1414726782015


Fill your little goodie bags with your gift – My Slate Paper Bag contains a handful of Mentos. The Slate Button Bag has a lovely Bath Bomb. (I had to include it in the photo because it is like the flowers I had been stamping!)

Close To My Heart Products used in these projects

s1411 It’s The Little Things

November Stamp of the Month S1411 It’s The Little Things available exclusively throughout November for $27 or for just $5 when you spend $75. with your CTMH consultant. I’d love you to leave a comment before heading off to the next stop,  Sue’s Blog, Patricia Manhire – Patricia Manhire’s Creative Corner


10

Everything ABC’s Letter U -Umbrella, uninked….

abc bloghop

Welcome to the Everything ABC’s Blog Hop!

For this hop we will be featuring the letter U. This may be the name of a paper, a stamp set or an embellishment. Whatever the crafter has chosen as their U element will be featured in their post. If you have just hopped onto my blog, please start at the beginning at Linda’s blog ~ Scrappy Therapy 

If you came from “Wendy Kessler My Scrapbooking Blog ” then you’re on the right track!


U is for Umbrella, uninked and unavailable!

There are not many U words or elements I can think of so I struggled to find a U that would be unique for you today. I decided on this Umbrella as I was preparing for my Girls Night In Fundraising event.which I call ‘Inky Pinky’ and we work with pink products from Close To My Heart. I could also have called this post uninked…as there is no stamping here at all! I also used some of my leftovers from kits that are now unavailable which of course is doing as we should using my stash.

For this years Girl’s Night In event all my guests are getting a selection of Chantilly PML Z1949 cards and the challenge to make a layout with them. One of those cards is the umbrella card with the sentiment ‘Let’s Dance in the rain‘ I have used in the layout below. It was my focal point around which I selected everything else.

I really like the sentiment and a few of the others I have placed on this double page spread. I love ‘Don’t forget to be AWESOME‘ and ‘Adventure Awaits the Daring Girl.‘ I have fussy cut some of the birds too. This layout has what I consider key elements – spots for photos and places to journal, and a bit of decoration and inspiration. It just needs the photos!

PicsArt_1412912730109

I now have the challenge of TAKING photos for a page I have already prepared! (Isn’t that familiar?) Photos in the rain…having fun! Probably with pink roses or a bra or two showing!!! Who knows, but I will do my best to find an awesome photo opportunity. (Easier said than done in an area that only gets a few inches of rain a year!)

Picture My Life cards do make great quick and easy to finish scrapbook pages. I hope you have been inspired by this one. The pink Ribbon icon is cut from the Artbooking Z1906 J key using Pink Glitter PaperZ1922. I love the way our glitter paper cuts! Use the settings heavy card stock and cut twice to ensure you get right through. The zipper lace is no longer available and I have used up leftover Lolly Doodle papers on this layout.

Shopping List – For the products used in this layout and more the online store is open 24/7


Don’t forget this month we have Free Ribbon with an order over $60 AU and you have an awesome Stamp of the Month for Just $5 with order of $75 AU or more. Read more here.

If you would like to donate to Girls Night In fundraising events raising funds to find a cure for Breast Cancer,  please go to this link. I would love to hear from you if you do donate.

Your next stop on our Everything ABC’S blog Hop is “Melissa Hegwood- Scrappin’ More Mom

In case you get lost along the way…go to Scrappy Therapy (link: found on signup doc) for a complete list of participants!

jenny sig

8

CTMH Stamp of the Month: Happy Place S1403A Australasian Blog Hop

Hello and welcome aboard our Stamp of the month Australasian Close to My Heart Blog Hop. If you have arrived here from Patricia’s Blog then you are in the right place. If you landed here by accident, no problem, please join in by following the link at the end of this post.

I love our March Stamp of the Month. (SOTM) We can get ahead and create some Mother’s day cards, or simply celebrate the unique bond of mothers and daughters with this month’s SOTM Happy Place. I decided to work with a project that would give you plenty of time to complete in time for Mother’s Day in Australia and it all begins with a box and some scraps! March Stamp of the Month Happy Place S1403A available exclusively throughout March for $24 or for just $5 when you spend $75.

Ivy Lane Card gift box

The completed gift box filled with hand made cards ready for your mum or special friend to send on call. What a lovely hand made gift this will make!

The completed gift box filled with hand made cards ready for your mum or special friend to send on call. What a lovely hand made gift this will make!

I am using leftover bits and pieces from my Ivy Lane WOTG kit, Ivy Lane Card making kit, Ivy Lane Complements and Ivy Lane Assortment , and the colour ready Card Box. Of course you will also need the SOTM My Happy Place S1403A

21-20140226_193759

They say in patchwork (and building)  to measure twice and cut once. I need to remember that as it did take me several goes to get the base on the lid and flap of this box. Ideally your piece will run right over the back to the bottom. I had already glued a piece to the back so I couldn’t do that. I will give you the measurements I used but please be aware some fudging is required. The box lid is slightly wider than the base. I had to trim an extra smidge to get a nice fit as I went through the process. There is also absolutely no reason you couldn’t use even smaller pieces of varying sizes of scraps and mix and match to decorate your box. The key design elements here are the top piece of B and T paper, with Babushka Mum and baby dolls and the flower cluster. The rest has been created to coordinate with that vision.

Top of the box art work

Top of the box art work

Ok so looking first at the top, I cut the focus B and T paper – the lovely one with pale ink tones and handwriting – and cut it to 6 x 4 1/4 inches. The Hollyhock piece is 6 1/2 wide and 5 7/8 long. I do try to avoid 1/8 of anything. Here I found that to be slightly too long but not even an eighth and to cut it at 5 3/4 it would have been too short. By flipping the box over onto the lid I was able to fudge the fit trimming a smidge away with a craft knife.

18-20140226_201552

Fudging the fit by trimming a smidge using a craft knife and the versamat.

Now this lid opens and closes – so every fold needs more than just one score line to accommodate it. Once again paying attention to the placement of your measure – having the paper the right way around – score at 1 1/8. This will be the the bit that comes own the front over the magnetic flap on the box.

The CTMH ruler has a steel edge and 1/8 markings making it easy to measure that little 1/8

The CTMH ruler has a steel edge and 1/8 markings making it easy to measure that little 1/8

On the back I placed a piece 6 3/8 x  2  1/4 wide and did a smidge of trimming again.

I did not like having an open edge at the back. It was a bit like missing cornice or skirting boards in your house. I tried washi tape but didn’t like the result with the colours I had so I went for the Gold Shimmer trim. This shimmer trim is currently exclusive to the Ivy Lane Card making kit – and you have heaps of it left after making the cards, so why not use it here right? OK – that fixes the seem and is strong enough in bond to hold well. I fixed all these papers to the box with Bonding Memories glue.

17-20140226_201644Around the front and sides of the bottom of the box I simply looked at the strips I had – the center one was about 1/2 inch too short to go all the way in 2 pieces. I glued these from the back to the front on each side – I had a plan to cover the gap. The bottom has the lovely strips in the Ivy Lane Complements pack. The top is more of that gold Shimmer trim. I picked a flower from the Complements sheet and the bottom was done.

Next I focused on decorating the top. I decided to work with a paper piecing technique. I stamped both the mother and baby dolls on three different colours of scrap B and T Duo and once each on white card stock. I fussy cut the pieces and then played dress ups. I tried several different colour ways and ended up going with the one you see finished here.

stamp the images several times on different papers. Experiment a little.

Stamp the images several times on different papers. Experiment a little.

The Cutting diagram will show you the different ways you can cat these designs. If necessary you can re ink the edge of pieces. There are 5 key parts – the body (which can be the whole) the apron, the head scarf, the tie and the face. On Mum there is also her flower that can be cut separately. For all dolls it is also possible to separate the hair, but I found it easier to colour this part with watercolour pencils. 

Cutting chart.

Cutting diagram.

Fussy Cut

Fussy Cut

Dress rehearsal

Dress rehearsal

When you have all your pieces trimmed out do some dress rehearsal. Experiment a little with colour combinations until you are happy with the result.

Colour up a little with a light shade to take the stark whit away. I used sorbet for the face, Purple for the eyes and Brown for the hair.

Colour up a little with a light shade to take the stark whit away. I used sorbet for the face, Purple for the eyes and Brown for the hair.

Glue them all together Re ink edges if cutting took too much black outline away.

Glue them all together Re ink edges if cutting took too much black outline away.

carefull trim vey small pieces f 3D foam tape for the flower and the scarf ties.

carefully trim very small pieces f 3D foam tape for the flower and the scarf ties.

Once the Babushka dolls are ready it is time to plan the floral cluster. In making my Ivy Lane page layouts I cut extra flowers for the pages. I have made these more dimensional by gently rubbing in the center of them with my bone folder on the back of the versamat. This makes the petals pop upward, just like magic.

gentle circular rub and up those petals will pop

A gentle circular rub and up those petals will pop.

I layered these together to create the paper flowers on the box. It is now time for rehearsal again. Experiment with the placement of the dolls and flowers. I like to back a group of flowers with greenery and the swirl from the Ivy Lane Complements was perfect. Take care removing it from the sheet with all the curly bits. I placed this first, then my dolls, then my paper flowers. I then used the flower assortment that came with Ivy Lane WOTG. Be careful with these – cut the bit of sheet they are on to experiment rather than pull them off the backing. The adhesive is strong. If you put them in a place then change your mind you may be too late. I decided the pale pink ones did not work in this design so I left them out. I finished with the purple glitter gems.

This image is showing you the different heights and dimensions of the finished project

This image is showing you the different heights and dimensions of the finished project

I chose the Like Mother Like daughter sentiment. I stamped black on white and used a dauber loaded with hollyhock to soften it and pink it up and mounted this on a bit of the pink Ivy Lane B and T paper. I have already made my Ivy Lane cards so I popped them in the box and voila, the gift is finished.

Here you can ee how i covered the gap at the front of the box way back when I started this project.

Here you can ee how i covered the gap at the front of the box way back when I started this project.

Ok – Sorry this was such a long post but I hope you can get though the instructions! Here is another look at the finished box to save you scrolling back to the top

The completed gift box filled with hand made cards ready for your mum or special friend to send on call. What a lovely hand made gift this will make!

The completed gift box filled with hand made cards ready for your mum or special friend to send on call. What a lovely hand made gift this will make!

Want more Piecing? How about this example using Skylark

Pieced card using Skylark scraps

Pieced card using Skylark scraps

SOTM Happy Place is only available until 31st March from your CTMH consultant. I’d love you to leave a comment before heading off to the next stop, Mandy’s Hall of Indulgence . Happy Hopping!

Shopping List

WOTG Ivy Lane G1073

Ivy Lane Card making Kit G1079 This is where you will find GOLD shimmer trim!

Ivy Lane Complements  x7178C

Ivy Lane Assortment Z3001

Purple Glitter Gems Z1936

Stamp of the Month – Happy Place

My Creations Card Box Z1647

Watercolour Pencils 3505

Exclusive Inks – Black z2105

Bonding Memories Glue 1512

3D Foam Tape Z1151

Art Philosphy Cricut Collection (Use to make the flowers) Z1686 

Tools – Versamat z1279 Bone Folder Z1204 Ruler Z1471 

8

Sensational scraps

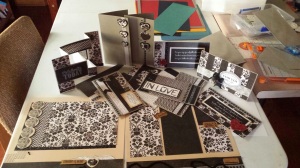
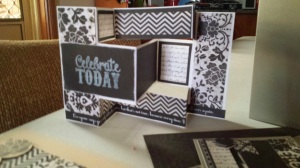
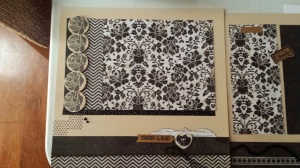
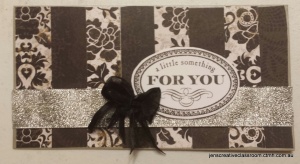
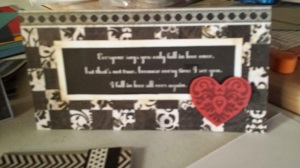
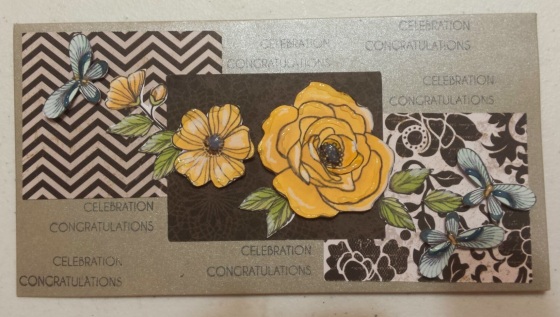
I have been cleaning up and making way for exciting new products coming out in February. I had a LOT of For Always scraps as I used this paper as a feature in an albu,. I had zip strips, 1 inch strips, little rectangles and squares. There were lots of bits of paper I was loathe to throw away.

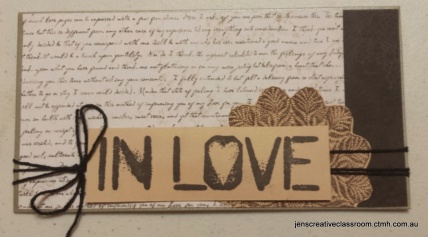
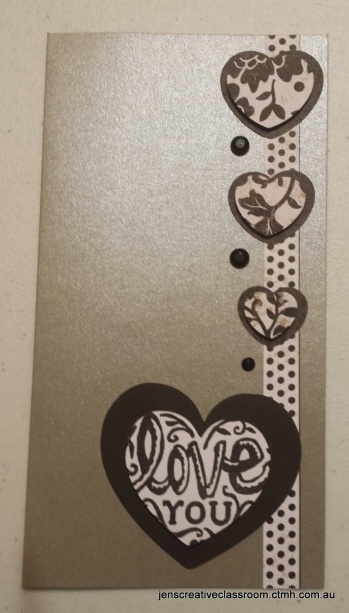
I got myself some silver card bases which made a nice background to this paper and went to town with my scraps. I made a dozen cards and 2 scrapbook pages!

20140106_091751

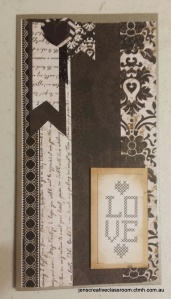
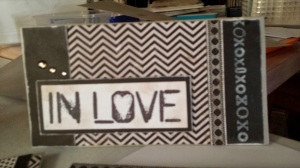
Here are the cards I made using the current Stamp of the month

Usnf the Stamp of the Month

Using the Stamp of the Month

Using Stamp of the Month

Using Stamp of the Month

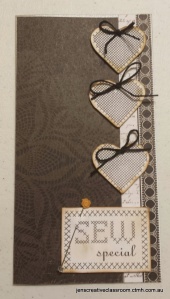
For these cards I used the stamp set in the Sarita WOTG kit

Using Sarita WOTG tamp

Using Sarita WOTG tamp

Using the Sarita Stamp Set

Using the Sarita Stamp Set and Love Doily 

Using the new awesome Cloud Nine stamp set

Using the Cloud Nine stamp Set

Using the Cloud Nine stamp Set

20140109_211452

Using the Cloud Nine stamp Set

Using the Cloud Nine stamp Set

This one uses a host only stamp

20140106_091814

Here is the page using stamps from the For Always WOTG

20140106_091955

For these I made use of all the strips in the first one and in the second I punched little 1/2 inch squares and the Zip Strip for the title

20140109_211357 20140106_091939

Finally one that started out as three blocks and grew to something special inspired by Atlantic Hearts Sketch 37

Sketch 37

For this one I have used the Card Word Puzzle  set and coloured the images with a variety of Exclusive inks markers. I little shine is there thanks to Liquid Glass.

20140109_211332

This was the first of three sets I will be doing. It was fun and now I have an even more fun stash of cards ready for the right occasion at very little cost since I used scraps to create them.

If you like the papers featured here be sure to pop over to my online store and make a purchase of For Always before it disappears completely. The same will be the case for the Sarita WOTG stamp. Also retiring is Card Chatter. As a bonus while you are shopping you can get the Cloud Nine Card making kit and Stamp of the month with qualifying orders!

Find out more on You Tube