 Welcome to the Everything ABC’s Blog Hop!
For this hop we will be featuring the letter G. This may be the name of a paper, a stamp set or an embellishment. Whatever the crafter has chosen as their G element will be featured in their post. If you have just hopped onto my blog, please start at the beginning at Linda’s blog ~ Scrappy Therapy If you came from Darlys Recker – Crafty Happy then you’re on the right track!
G is for Glamour!
We have plenty of Glamour at Close To My Heart! There is of course lots of shimmer and bling to choose from. We have glitter papers that do not flake everywhere. We have a whole range of colours in sparkles and gems including the Sparkle Black Flourishes. I also I love our alphasets and I especially love the Glamour sets D1537 and D1522. It is this alpha set that was the starting place for my project.
Glamour Upper Case Stamp Set
Glamour Lower Case set
From this decision and selecting the photo I then went for a browse through my Cricut Collections and found an overlay in Artbooking which has doubled as a stencil and glamour icons Artiste. There is the Eiffel Tower, a Dressmakers manikin, a dress, a coat hanger, a chandelier and more on p 40-41. I cut the overlay from page of Artbooking p 47. Then I did a bit of everything else. I tried a few different pieces and not all made it to the completed page. But that is ok – that is what Mixed media is about!
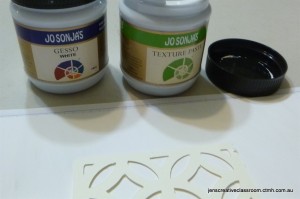
In my stash I had gold ribbons, paper clips and some other bits and pieces along with my Gesso, Texture paste and Spray pens.
Finally I grabbed my Base and Bling rhinestones ( I could have chosen more!) and I had a rather large assortment of Glamour pieces to choose from for my page to go with the Glam look of my girlfriend and I celebrating in style.
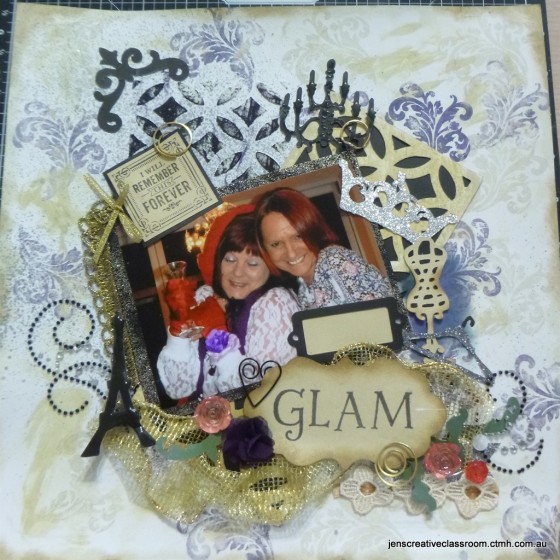
Of course red an purple are hard to work with. By sticking with neutrals of Black, Bamboo, and Desert Sand in both Ink and cardstock I was able to back this photo and not create too much competition.
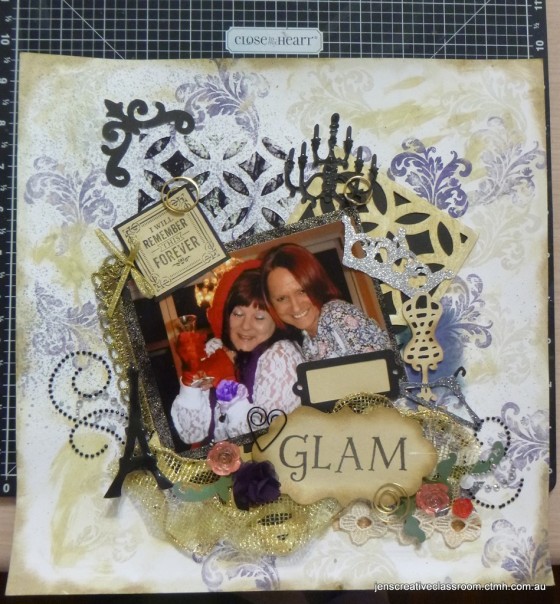
Here is the final page I came up with
The How
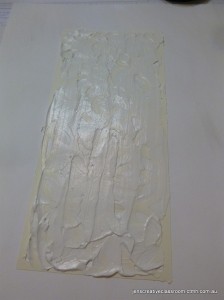
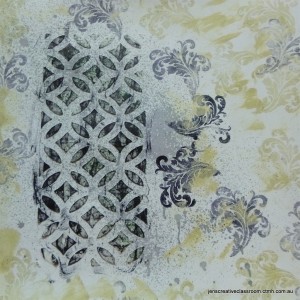
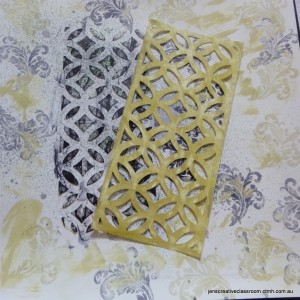
I began with a white cardstock base and first sealed it with gesso. (Available from art supply and craft stores) CTMH cardstock is very absorbent for any wet techniques so this step is important. I then used my overlay as a stencil and added texture paste. (Available from art supply and craft stores). Wipe the excess paste off the stencil and you then have the overlay ready when dry for inking. This step was left overnight to dry.
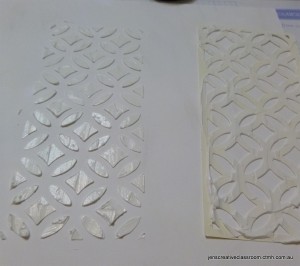
Lift the overlay (stencil) away, wipe off excess and leave to dry. Baking paper is excellent for this as nothing sticks!
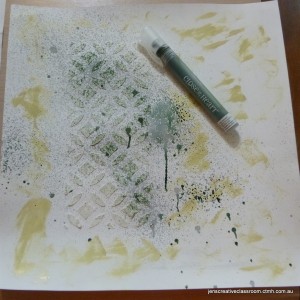
I then sprayed black ink onto the surface. It looked more grey than black when dry but that was ok. You can see a touch of green in this when sprayed too. I rubbed the dried texture paste with the ink pad and got a nice strong black as a stark contrast. I then smudged the background with Bamboo Pigment in and then background stamped the page with Bamboo and Black. For the black I used secondary stamping technique. This means you stamp once on scrap then on the project. This took the ‘strong’ black out so it did not compete with what was to come. The stamp set for this section of the work is from Inspiration Flourishes Stamp Set C1581. I also used this stamp set in the embellishments on the page.
. Next I had to bling up the Paper for the photo so I used Versamark ink and some Silver embossing powder. You could easily use Silver Glitter paper to do this without all the fuss!
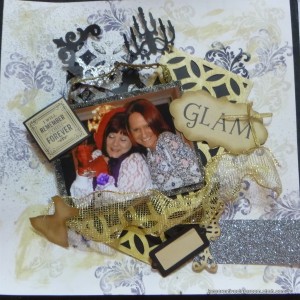
Dress Ups! This is the fun bit. Play around with your elements and where you may place them on the page. Once you are happy with it you can begin to stick it down.
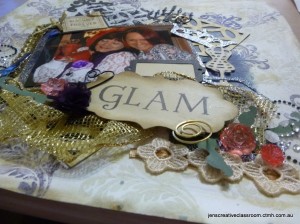
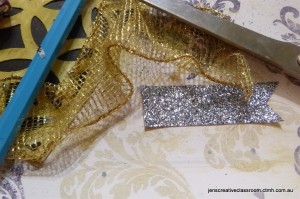
Now I finished off elements ready for the page. I used liquid glass on the Chandelier and Eiffel Tower, distressed the edges of the dress, put overlay on the manikin and stamped and distressed the title and other elements.I found the overlay needed black behind it so I did that and my piece of scrap silver was too big so I made it smaller. I added and took away bits of ribbon and things from my sewing stash too. You get the idea. play dressups and see what you come up with.
My Gold ribbon was wired. To stick it down I used Liquid Glass and a bit of weight thanks to a craft knife and scissors while the glue dried. I also used foam tape to help with height for the other pieces.
I then went ahead sticking all the other bits down. At last minute I decided to add the ivy lane flowers and therefore needed a bit of green – I had some other pieces I had cut and the negative spaces from these so they did the job. The finished arrangement is not like the first – the dress or the tower….I wanted the Eiffel Tower to fit in. I also needed to sponge a little more black under the dressmakers manikin so it didn’t get lost.
Finally I decided the page needed an edge so with the help of daubers and Bamboo and Desert sand I got a distressed edge.
Here is another look at the finished piece.
I hope you have enjoyed this project and are inspired by this way of taking your scrapbooking to a new level with mixed media and the help of the Cricut Collections. I hoe you know by now you can get a Cricut Collection Free this month if you join us at Close To My Heart.Discover the Art of Business Promotion. That is a whopping $130 AU extra for your kit to get started. Please chat to your consultant about the April 2014 CTMH opportunity!
This is the final stop on our Everything ABC’S blog Hopfor the letter G. I hope we have inspired you! You can go back to the beginning Linda Norman- Scrappy Therapy . If you have just entered the hop be sure to head over there and go through all the posts. Hop on over there and See what she has done with G!
CTMH Products used in this project are available to purchase online.
- Glamour Upper Case Alphaset D1537
- Inspiration Flourishes C1581
- Inks: Black Bamboo Desert Sand
- Black and silver Glitter paper Z1829
- Cricut Collection Artbooking Z1906
- Cricut Collection Artiste Z1790
- Spray Pen Z1380
- Liquid Glass z679
- 3D Foam Tape z1151
- Ivy Lane Assortment Z3001
- Sparkles Black Flourishes z1745
In case you get lost along the way…go to Scrappy Therapy (link: found on signup doc) for a complete list of participants!



This is a beautiful layout- love your use of the gesso and stencils!
LikeLike
Thank you 🙂
LikeLike
Gorgeous! I love all the layering and the fact you included instructions of your techniques.
LikeLike
Thanks Shalana – we are the ‘let me show you how’ gals!
LikeLike
Wow, mixed media! I love it! Way too much work for me but beautiful!
LikeLike
Thanks Linda – I do not do this all the time but I am in a happy place when I do!
LikeLike
Wow!! Wonderful techniques and the final project is beautiful!
LikeLike
Thanks Catherine
LikeLike
Your layout really makes the picture POP!
LikeLike
Thank you Cindy! I always worry with this kind of work – you need to know when enough is enough and that is the tricky bit!
LikeLike
Gorgeous page! I love it!
LikeLike
Thanks Cary!
LikeLike
Wow, beautiful page! Very Glam!!
LikeLike
It was a glam night – it deserved the glam touch 🙂
LikeLike
Magnificent layering- love the glitter paper chandellier
LikeLike
Beautiful layout! Great ideas and techniques!
LikeLike