 Welcome to the Everything ABC’s Blog Hop!
For this hop we will be featuring the letter E. This may be the name of a paper, a stamp set or an embellishment. Whatever the crafter has chosen as their # element will be featured in their post. If you have just hopped onto my blog, please start at the beginning at Linda’s blog ~ Scrappy Therapy (link: found on signup doc)
If you came from “Pam Trostle Pam’s Crafty Creations”
Today I bring you a project which begins with Envelopes and their cards from the CTMH Bulk Colonial White card and envelope pack.
I have used 4 envelopes and cards to make this fun mini album. The idea springs from envelope mini albums posted by Kathy Orta on You Tube, but I have made this slightly differently. I trust you will find these directions adeqaute, but if not by all means head over and watch her video, especially if you have never made a mini album before. This mini album should fit 20 trimmed 6×4 photos – or the equivalent if trimming or using smaller photos. There are a number of pockets you can add more photo and journalling cards to too. I would expect, if you have a go at this, that yours will turn out differently from mine, making each and every mini album and individual work of art because of our choices in paper and embellishment. The best results for a beginner will come from using a coordinated collection. If you wish to skip right to a video walk through click here.
All of my decoration has been done using the one paper pack, making it easy to ensure everything coordinates nicely. I chose Jubilee simply because it celebrates summer time and because some lucky person will get this as a gift! It would look just as nice with any of the paper packs. Envisage it with Ivy Lane, Ariana, Balloon ride – or use White daisy and try Lollydoodle. Have fun with the decoration using scraps, stamps, complements and assortments. Dig through your stash for pretty laces and florals if using Ivy Lane or Ariana for example. Whatever takes your fancy!
We are going to make this mini book in 2 sections. Each is the same – the second is simply a repeat of the first. If you want a bigger book – add another 2 envelopes and off you go.
Here are the steps.
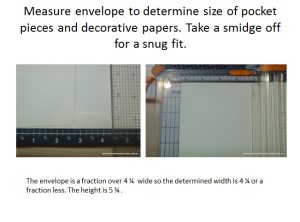
- Measure your envelope and your card. Write these down for reference. In this case we have envelopes 4 3/8 inches wide x 5 3/4 tall (sit them vertical at all times) Cards are 5 1/2 x 4 1/4 on each face.
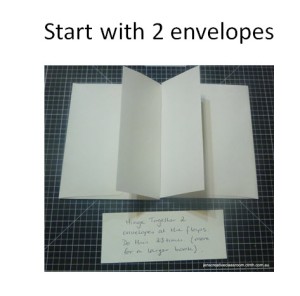
- Lay two envelopes vertically with flaps up together. Bond the two flaps of envelopes together.
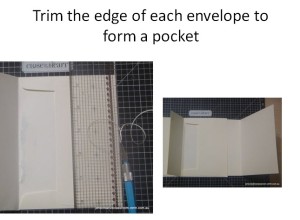
- Trim the closed edge on each side a smidge with a craft knife on the metal edge side of your ruler. This will form a pocket your cards will slide into. This is your foundation for everything else.
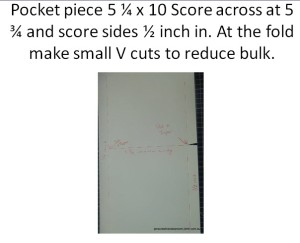
- Now we need to make a center pocket. Our card is 4 1/4 wide. We need to add a half inch to each side so cut a piece of Colonial white card stock at 5 1/4 inches wide. Trim to 10 inches long. Score 1/2 inch in down the length of both sides. From one end score at 5 3/4 (the height of the envelopes) across the middle. The shorter portion will get folded up , with the short side to the front and form a pocket. You need to make a little dart in the sides where this fold will go – this will help folded flaps sit neatly and reduce bulk.
- Fold the scored flaps in the side at the small section toward the cente. Flip it over and fold in the long flaps. Use your bone folder for a crisp edge. Turn it back over and secure the front fold(smaller) up onto the long side and secure the fleps. I used double sided tape for this right on the edges.
- To complete the pocket we need a back. Cut a piece of colonial white card stock 4 3/8 wide x 5 3/4 high. Attach this to the back forming another pocket. Do not be afraid to cut a smidge more off it if needed. Now you should have 2 pockets. (one with no bottom – yet)
- Attach this pocket section to the envelope flaps. Use secure adhesive such as double sided tape or wet glue such as bonding memories glue. (BMG)
You can now begin decorating all of the page faces.
- Now we need some of your print pieces cut at a smidge less than 4 3/8 inches wide x 5 3/4 tall. Just nudge 1/16 to 1/8 of an inch less on your trimmer so they will sit just inside all of the colonial white bases.
- Cover the left inside envelope taking care not to put any glue where we do not want it in the gap left by the flap. Run tape on the envelope edges top, left, bottom and centre. Use a fine line of bonding memories glue on the inside edge near the middle. Adhere your print paper. Repeat the same for the right side and do all four sides and across the middle of back of the pocket piece.
- To decorate the pockets we need bits of paper to fit inside – especially the first so tags we put in don’t get caught on the paper when you pull them out. Make sure you cut piece to fit a bit down into the pocket and cover the flaps. So a smidge less than before – Approx 4 1/8 wide and about 3 inches long for the cover of the top pocket. Measure your bottom piece. I used a scrap that didn’t quite reach the bottom but this isn’t a problem because it gets covered.
I apologise there is no photo of the next step but you will see it in the video.
- The piece to finish the bottom was cut with the cricut. There are many borders you can use. I used the Cricut Craftroom board. Copied the border. Flippeit, Welded it, stretched it so the whole piece was 3 inches wide. I cit it at 11 inches because I needed two. One for this half and one set aside for the next.You can see this in the video.
- Score this in the center. Score again left and right of the center by about 1/8th inch. (CTMH ruler grid has 8ths making this easy. Fold at the 1/8 score lines – the little gusset will allow for the widths of the papers here and fit snuggly, Adhere this at the side and bottom on the front to the pocket. Flip it over and adhere to the back. You now have a third pocket to tuck in tags and tickets!
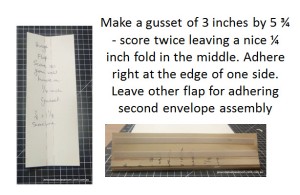
- Now you need a gusset. This is a 3 inch x 5 3/4 strip. Score at 7/8 and 1 1/8. This is the gusset – allowing room for bulking up your album with tags and photos without straining the spine. CTrim the top and bottom with a slight angle to reduce bulk in the top and bottom. Adhere one side of the gusset to the back of your mini book section being careful to be nice and straight.
That is it – decorate inside, make tags and then go ahead and make a second one (or a third if you are game – the principles are the same)
- Congratulations you have finished the first section of your book. Do the sam again with the second one.
- Join the two books together by adhereing the gusset flap of the second to the back of the first half. You front gusset should still be loose.
- The cards can now be inserted and decorated as you please. Sometimes I had a theme run over three spaces, other times each panel is diffrent. I also decorated inside cards as well as the flap that shows as a page.
- Carry on decorating – filling the pockets and making tags. Stamp designs on, add some bling, some string and more.
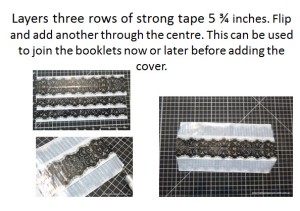
Once you are ready to put the two (or more) pieces together strong bindings and covers need to be considered. I located great tape, a stiff piece of cardboard (Chipboard in USA language – in Aussie speak this is a timber that requires cutting with a saw!) and a bit of ribbon from my stash.
- Now we need to add a closure. In the original video series the closure is done with chain. I prefer ribbon so that is what I have used. A good bit of BMG or even modge podge will enable you to wrap a length of ribbon right around from font to back. be sure to leave enough length to tie off.
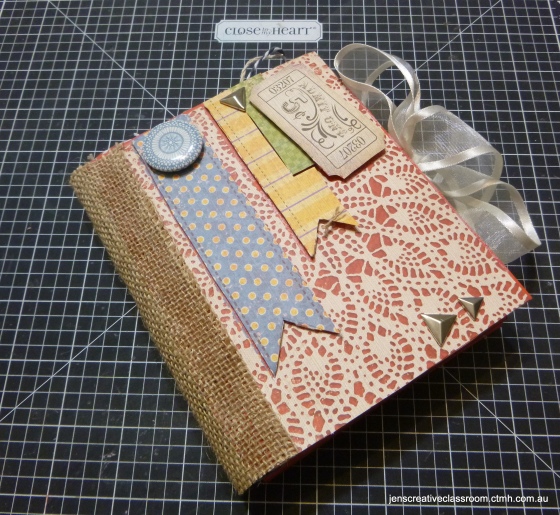
- The cover is now needed. If you have good strong cardboard you can stick dome of this down and decorate with paper. This is a small book and not to weighty. I decided our cardstock would not be enough. I found stiff cardboard. Once this was on I added a strong tape hinge here. I inked Cranberry cardstock with Colonial white for the back cover and got a bit clever with the front (see below) You can of course go bigger just like a book cover is bigger than its pages if you have the nice stiff cardboard (or chipboard as it is called in the USA) . I also put red on the front as my carefully selected piece is about to be fussy cut with the dovetail flags and ticket being mounted with foam tape. I needed red underneath. At first I tried it as one piece but the book didn’t open well. Two pieces were better.

I have covered the tape on the spine with a piece of hemp – CTMH burlap ribbon would look just as good
- After adhering the cover cardstock and images it is time to decorate the outside – ribbons, bows, washi tape, lace, buttons and charms are all options you can use.
- Here is a video flip through of my mini book made with Envelopes. It isnt brilliant but will supplement the above instructions.
I hope the video has filled the gaps and if not, I strongly suggest watching some videos on making envelope mini albums. They look fabulous and make a great gift and I really like the size of our CTMH envelopes!
Leave me a link in a comment so I can come and give you some kudos!
Supply List
You will need
- 4 cards and envelopes and 2 sheets of colonial white card stock.
- Your selected paper pack (in this case Jubilee) and embellishments
- Bonding memories glue (BMG)
- double sided tape if you have it – it really sticks
- Trimmer, ruler, bone folder, microtip scissors, a craft knife and versamat.
Close To My Heart Supply List – All Items are available to order online at my store. Once you are done shopping it will be shipped right to your door.
- Colonial White Cards and Envelopes X1410
- Bonding Memories Glue 1512
- Liquid Glass z769
- Versamat z1279
- Ruler z1471
- Bone Folder z1204
- micro tip scissors z1836
- Jubilee Paper Pack x7181c or WOTGx7181
- Love Doily Stamp b1418
- Colonial White Ink z2168
Your next stop on our Everything ABC’S blog Hop is ” Anita at Cards and Coffee”
Here is the complete lineup in case you get lost along the way 🙂
1. Linda Norman – Scrappy Therapy
3. Catherine Nowak ~ Catscrapbooking
4. Pam Trostle – Pam’s Crafty Creations
5. Jenny Gilbert – Jen’s Creative Classroom You are here!
6. Anita Autore- Cards and Coffee
7. Lauren Moore – CTMH Craftings
8. Michelle Battitori –
9. Sharon Chapman-Sharon’s PaperFiesta–
10. Cary Magnani – My Heart’s Design –




Pingback: ABC’s Blog Hop ~ E « CatScrapbooking
Wow! Love this mini and the very detailed instructions. I’ve pinned to try later.
LikeLike
Thanks Michelle.
LikeLike
. Love your mini album. Great directions. I am going to make this
LikeLike
Please let me know when you do! Would love to see it.
LikeLike
I am going to watch that video because I bought some of the 6×6 Kraft envies on sale awhile back! Also, cute project- someone is very lucky to get it form you.
LikeLike
It will work well with 6 x 6 – just remember to cut a smidge more off for a snug fit. Look forward to seeing the result.
LikeLike
How cute is that! Thank you for the video!
LikeLike
you are welcome – it was scary to do and turned out easier than I thought to put together. (As long as I keep my inner perfectionist away)
LikeLike
Awesome!! Great tutorial 🙂
LikeLike
Thank you
LikeLike
What a cool idea! Great directions!
LikeLike
Thanks – I do try to be thorough.
LikeLike
I absolutely LOVE your mini-album! Wonderful tutorial and video. Thank you so much for taking the time to write and show us how to make one.
LikeLike
You are welcome. I lobe that you have been inspired!
LikeLike
I love your mini album! Beautiful.
LikeLike
Jen, I love your blog and your ideas…I just started my CTMH blog a couple of weeks ago, also using the Bouquet theme. – Fawn (Photofunwithfawn.wordpress.com)
LikeLike
Jenny, you are always so clever and inspiring with your creations. Thank you so much for this wonderful tutorial, you are a star!
LikeLike
What a great mini album! And such a wonderful tutorial for us, thanks for the inspiration!
LikeLike
What a great idea. Love the album and great tutorial.
LikeLike